Node-based canvas
Explore the canvas interface, text, image and video nodes, connections, assets and shortcuts to create in one workspace.
1. Blank canvas
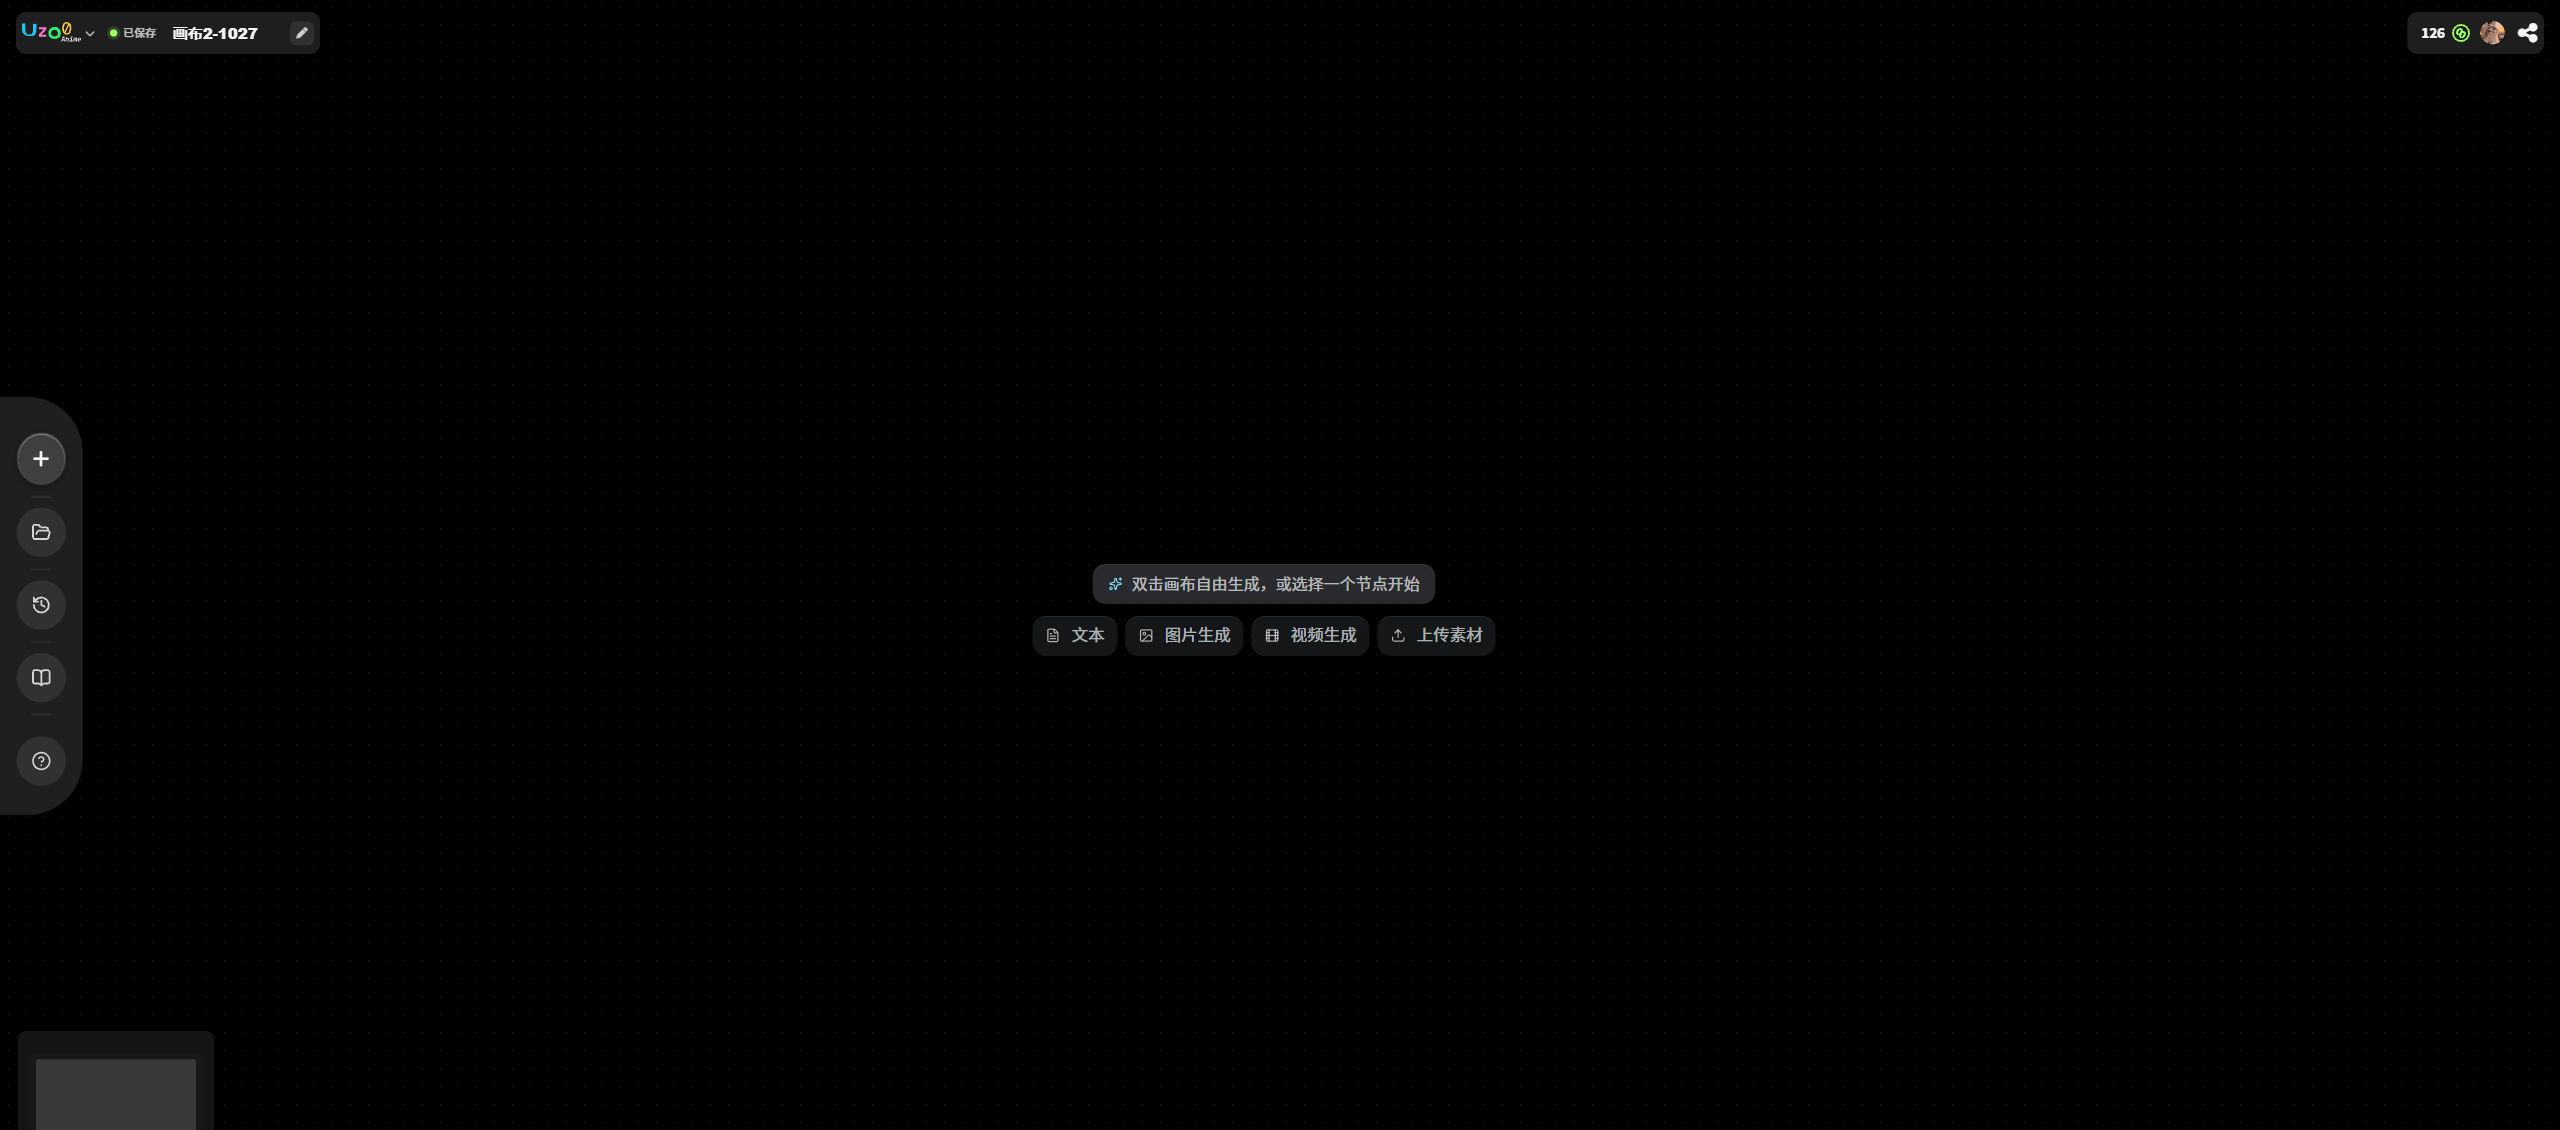
On the homepage, click [Blank canvas], then choose [New creation], or click [New] in the upper-right corner to enter the node-based canvas editor.
2. Inside the canvas
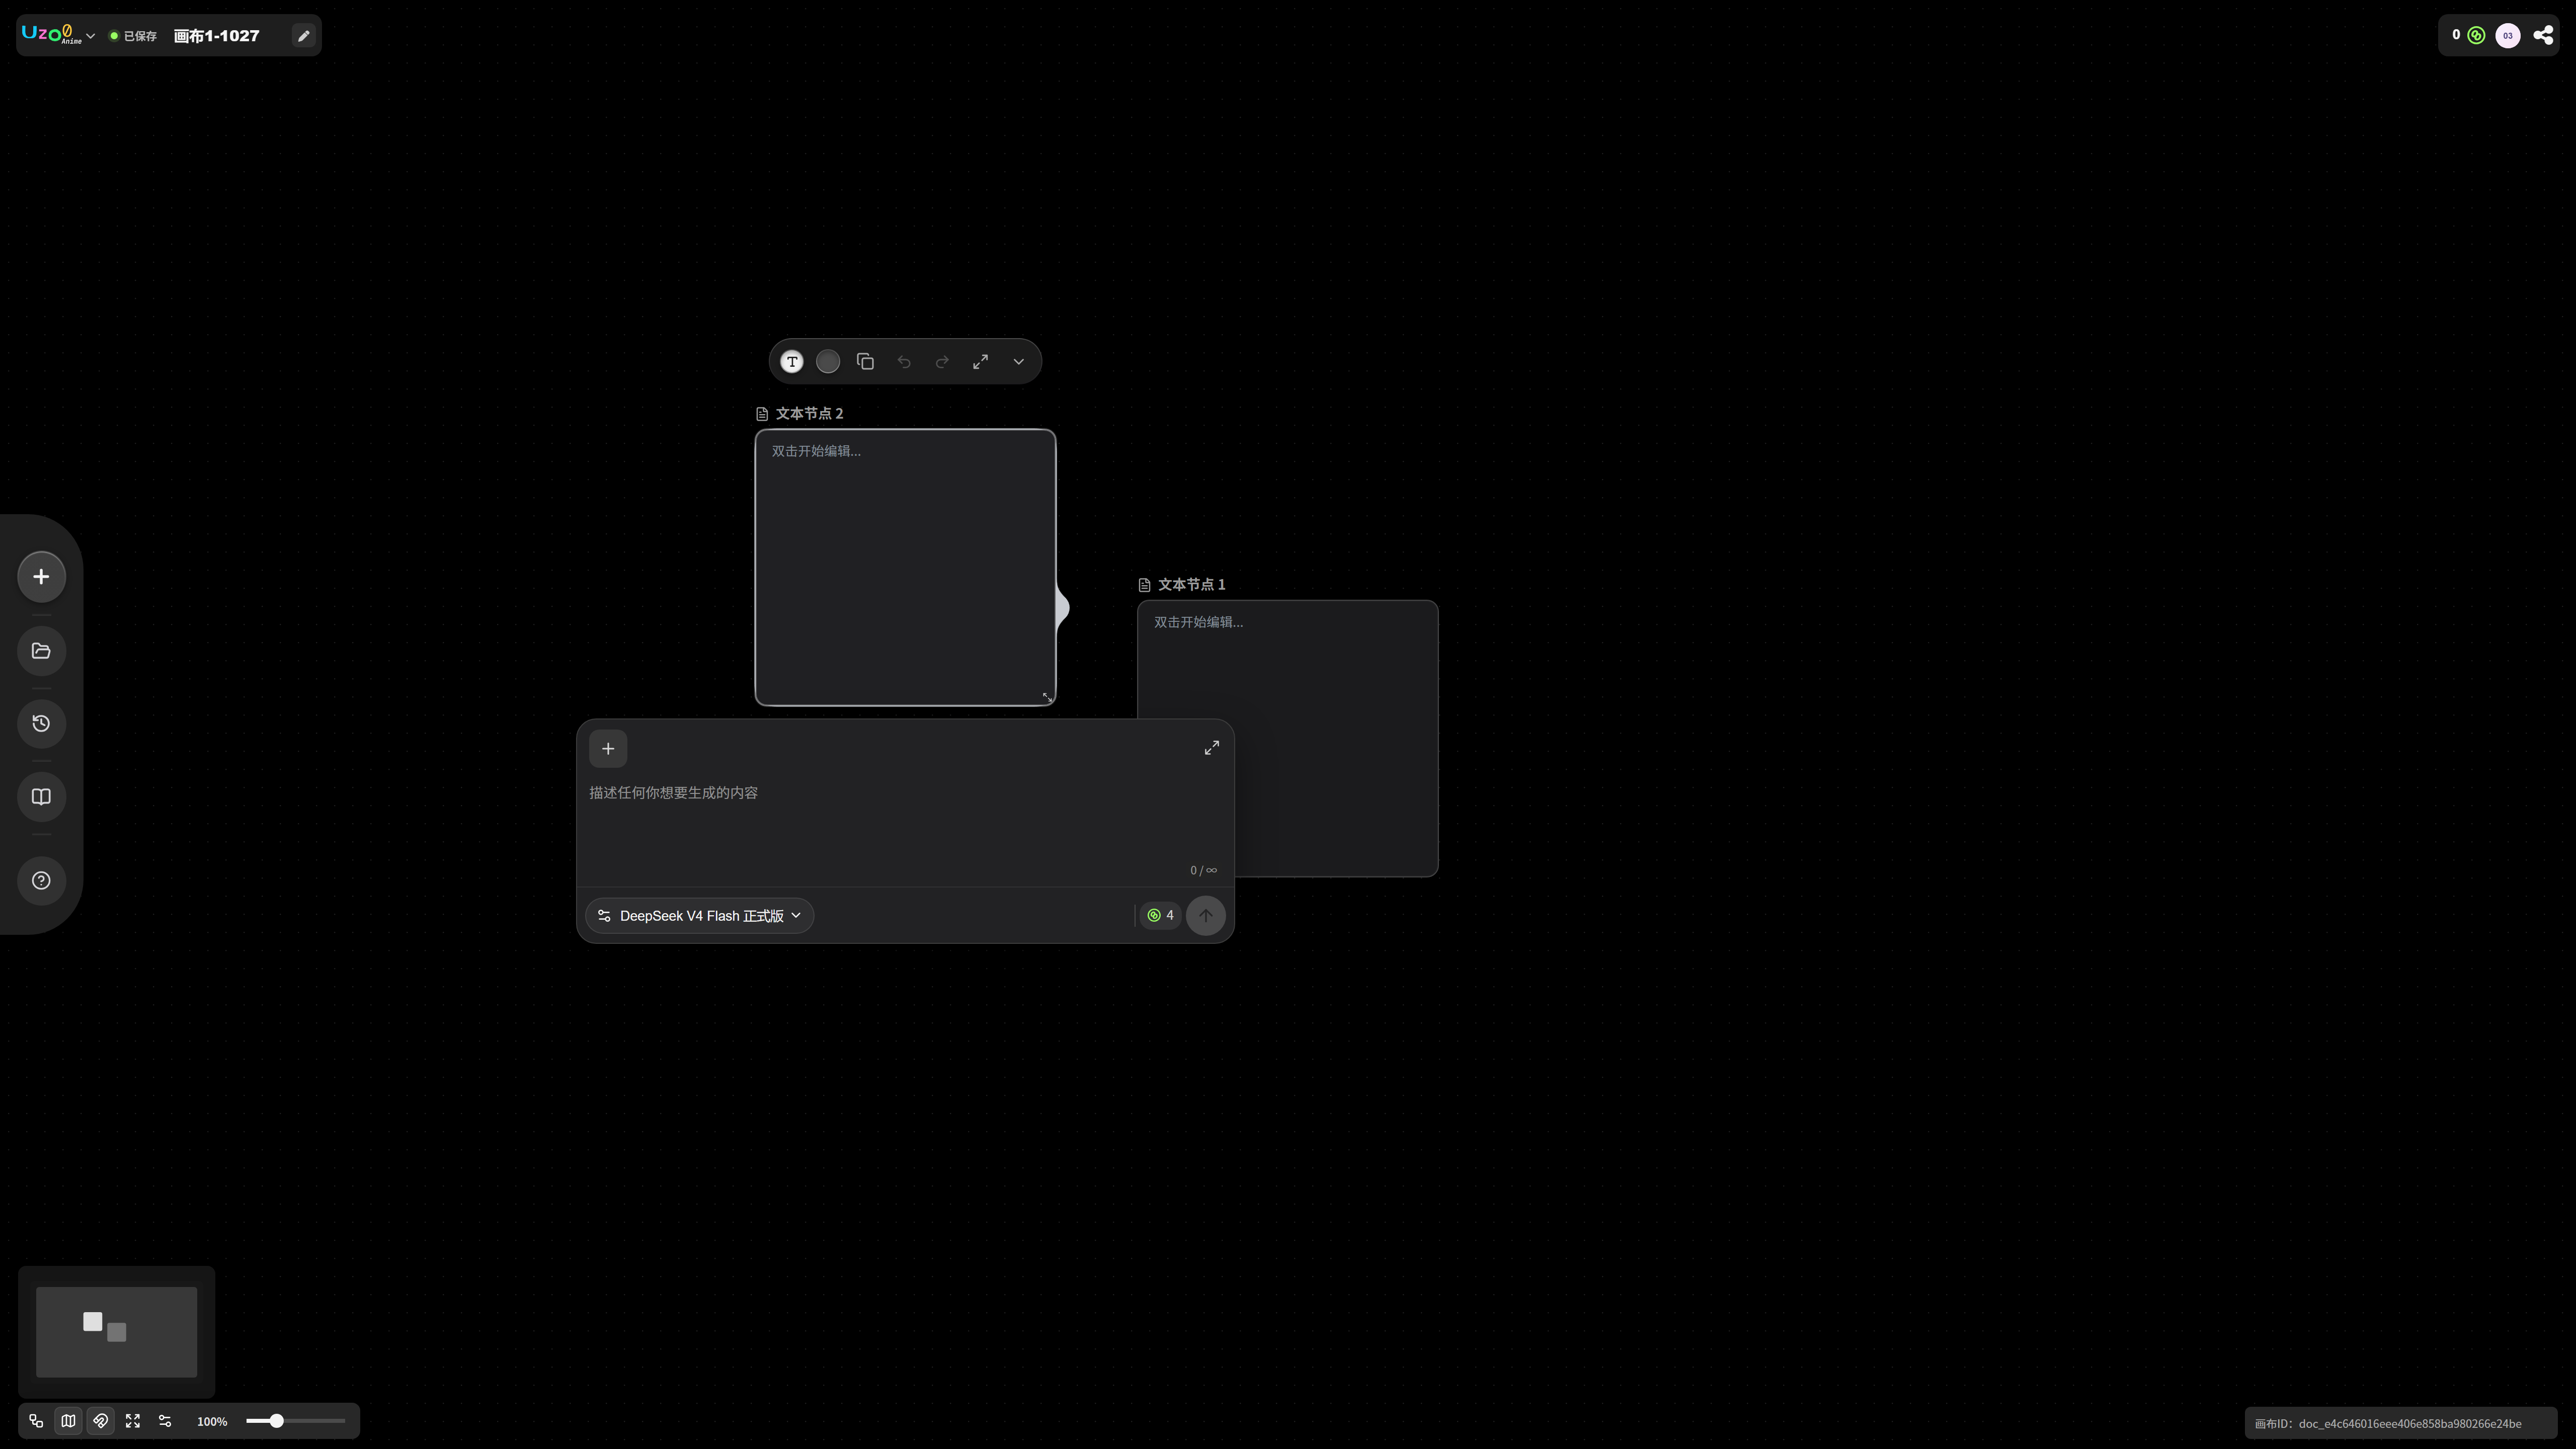
The canvas interface has five areas.
2.1 Upper-left navigation
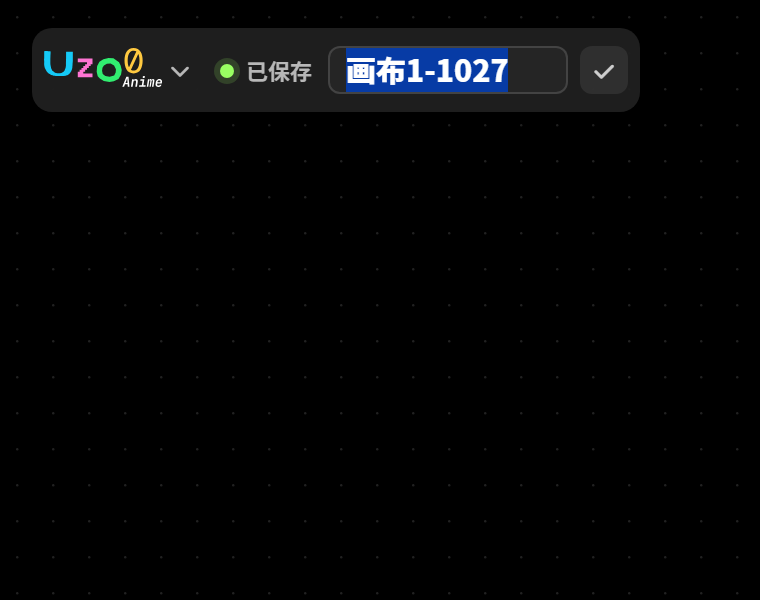
- Shows the canvas save status and project name.
- Click the icon on the left to open the canvas management menu, which supports returning to the canvas, creating a canvas, and deleting a canvas.
- Delete canvas: the canvas is moved to the recycle bin and retained for 30 days, during which it can be restored.
- Use the pencil button on the right to rename the canvas.
- The green “Saved” indicator means the canvas contents have been saved automatically.
2.2 Upper-right navigation
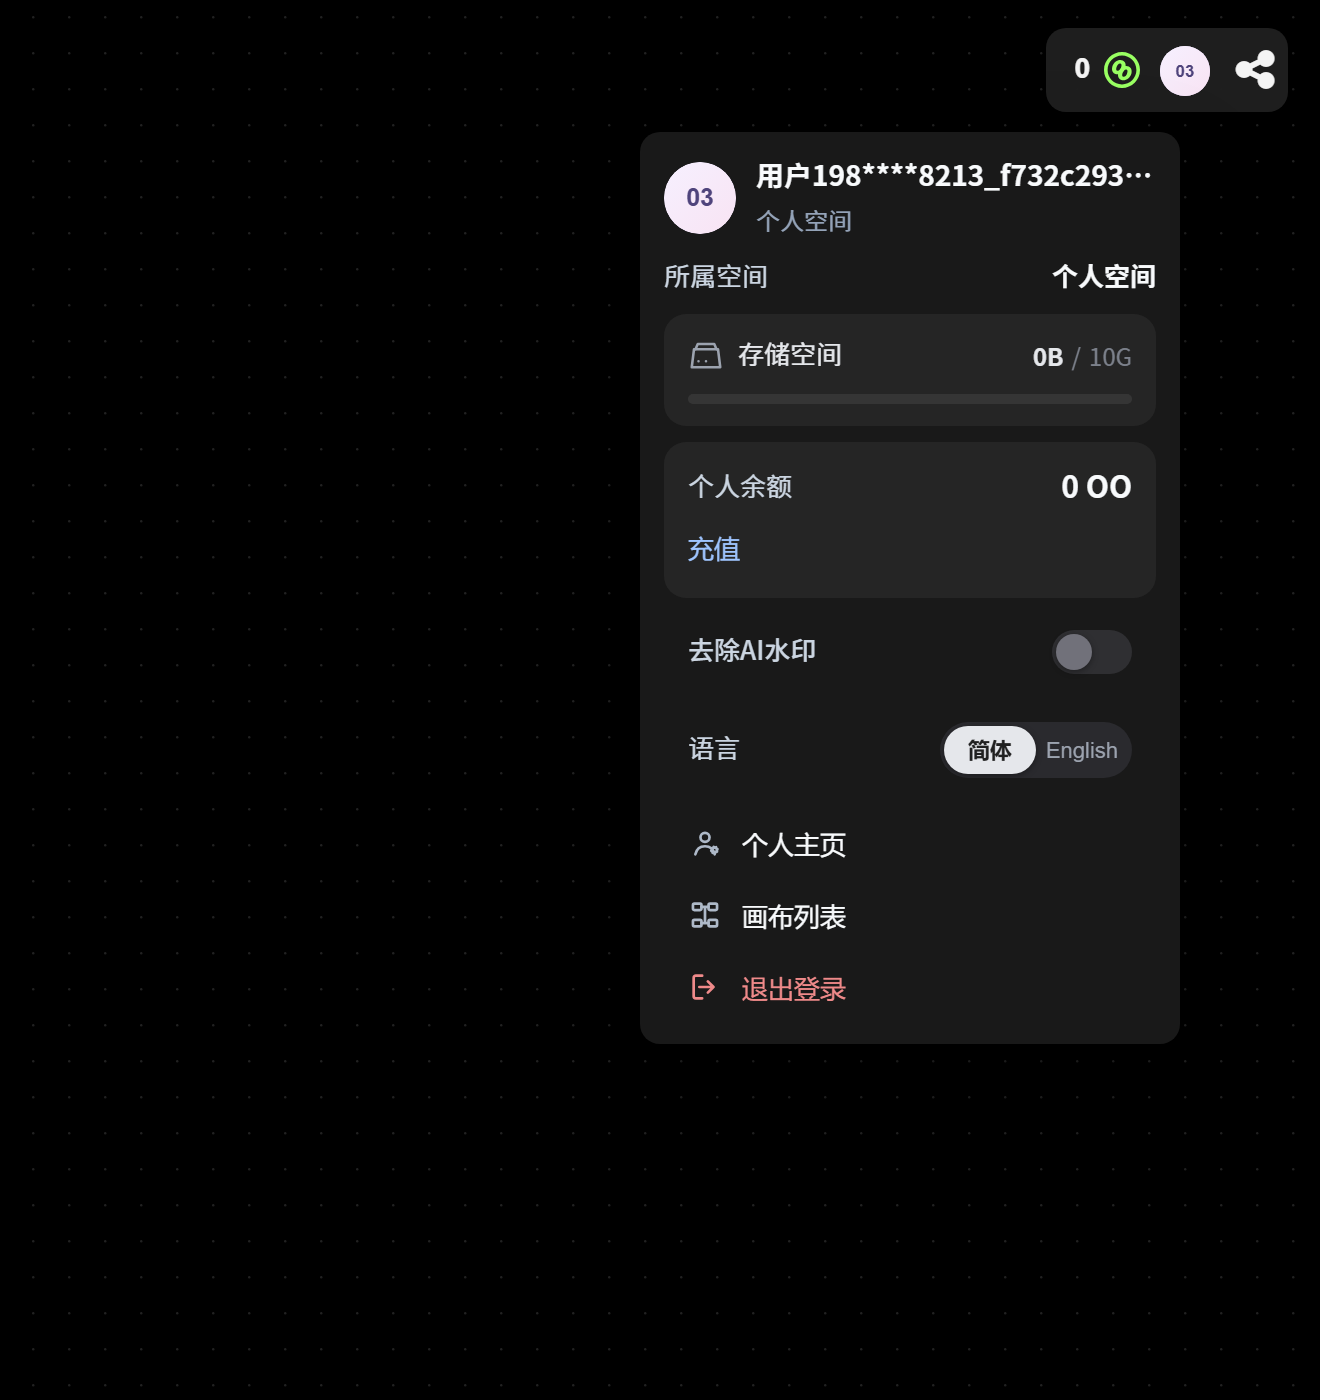
- View your account's OO Coin balance; click [OO Coin balance] to open the top-up entry point.
- OO Coins are the platform's compute tokens. Image generation, video restyling, and other tasks consume OO Coins.
- Key information: personal/team balance, member allowance, used allowance, and team storage capacity.
- Check remaining compute and storage allowances and manage team resources.
- Quickly open your personal homepage and view all your canvas projects.
In a personal space, the balance and storage are independent resources belonging to the current user. In a team space, the balance and storage are shared team resources for members of that team.
- Share by link: generate a snapshot link for the current canvas. Recipients can view its contents in real time, in read-only mode, and cannot edit it.
- Move to team project: migrate the current canvas to a team space. Once moved, it becomes a team asset and cannot be moved out.
2.3 Left toolbar

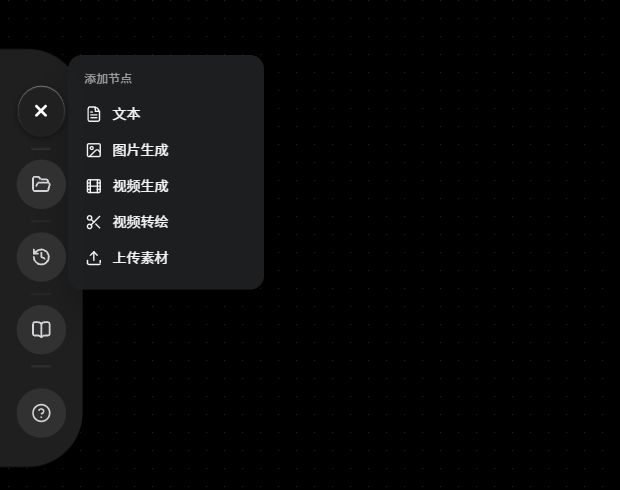
2.3.1 Add nodes
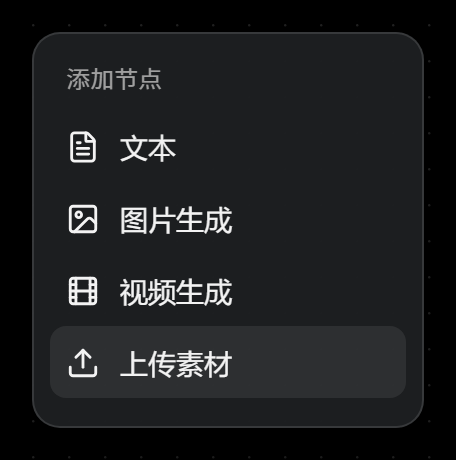
- Text: add a text node for entering prompts or recording ideas.
- Image generation: add an AI image generation node and configure it to generate an image.
- Video generation: add an AI video generation node supporting text-to-video or image-to-video.
- Video restyling: add a video restyling node to redraw the source video in a different style.
- Audio generation: add an audio generation node (currently unavailable/coming soon).
- Upload assets: import local images, videos, or audio as node input assets.
- Close button: collapse the left toolbar panel.
2.3.2 Asset library
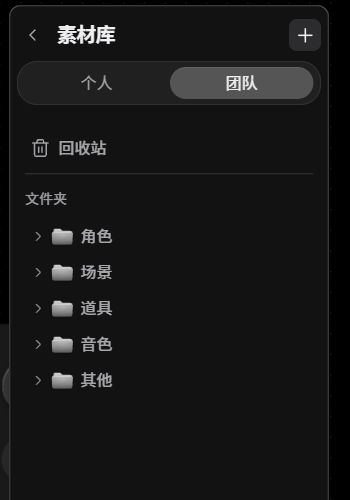
- Personal: view your personal assets.
- Team: view shared team assets.
- Recycle bin: manage deleted assets. Deleted assets are retained for 30 days and then automatically removed; they can be restored during that period.
- Characters / Scenes / Props / Voices / Other: organize assets into folders by category.
- Plus button: create a folder (up to three levels).
- The asset library is currently available only inside the canvas.
2.3.3 View history
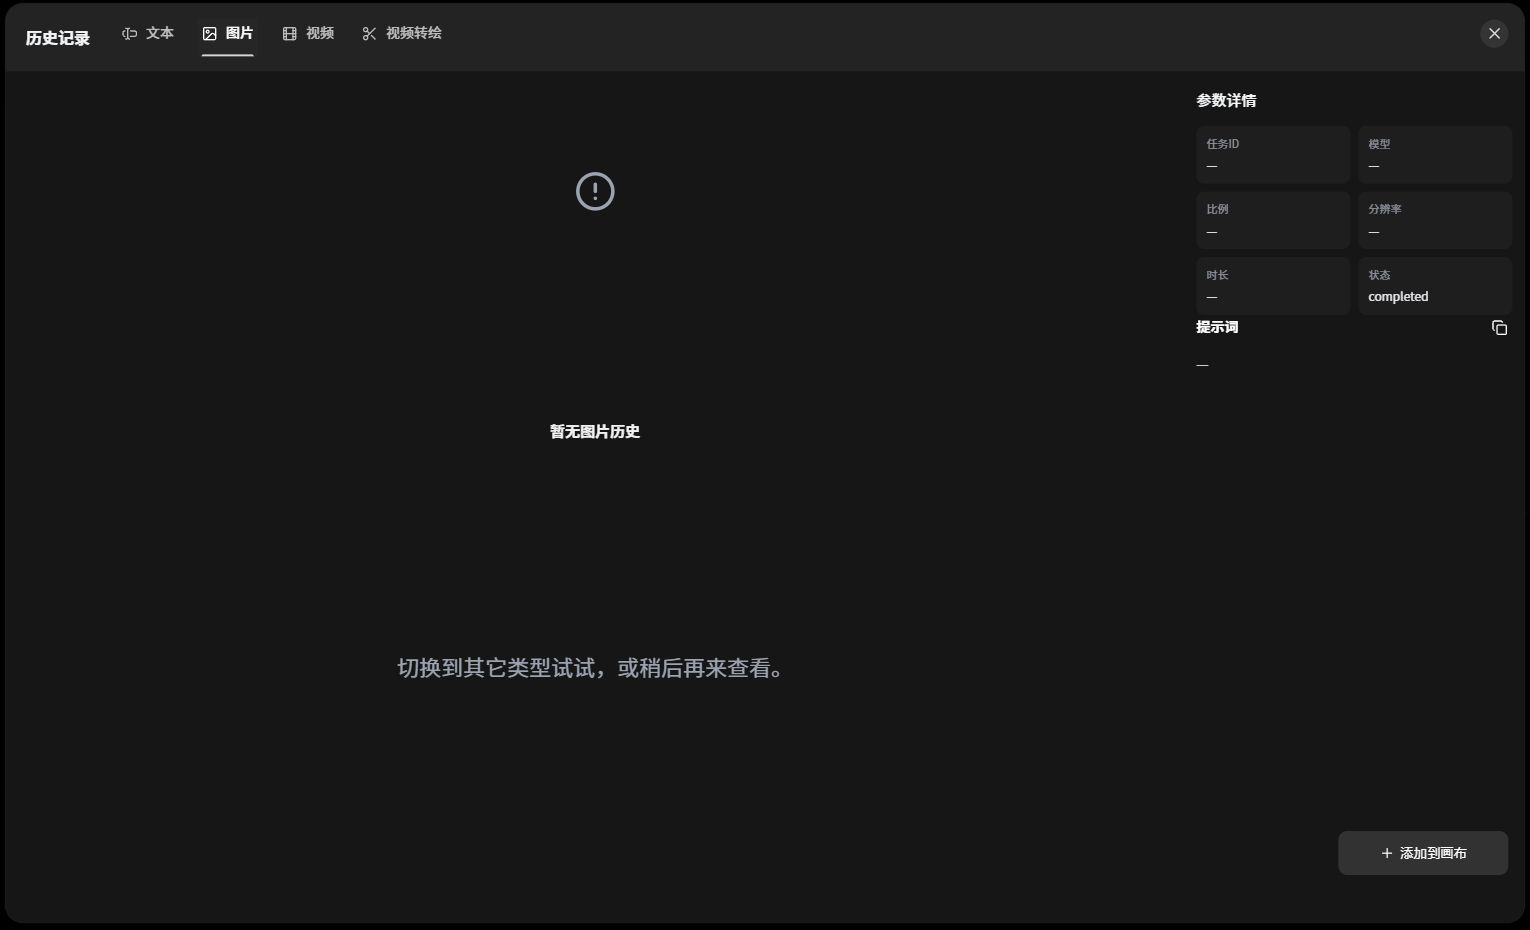
Click to view history:
- Category tabs at the top (filter by generated asset type)
- Images/text/videos/video restyling
- Left: historical task preview area
- Large image: preview of the currently selected task
- Horizontal thumbnails at the bottom
- Thumbnail cards for all historical tasks, with timestamps. Click a card to view the corresponding work.
- Right: parameter details (complete generation information for the selected task)
- Task ID: the unique task identifier, used for troubleshooting
- Model: the AI model used to generate the image
- Aspect ratio: 16:9; resolution: 1K
- Status: completed = the generation task finished successfully
- Prompt in the middle:
- The instructions used to generate this image can be copied and reused.
- Add to canvas in the lower-right corner:
- Import the selected image directly into the node canvas to continue creating.
2.4 Central canvas area
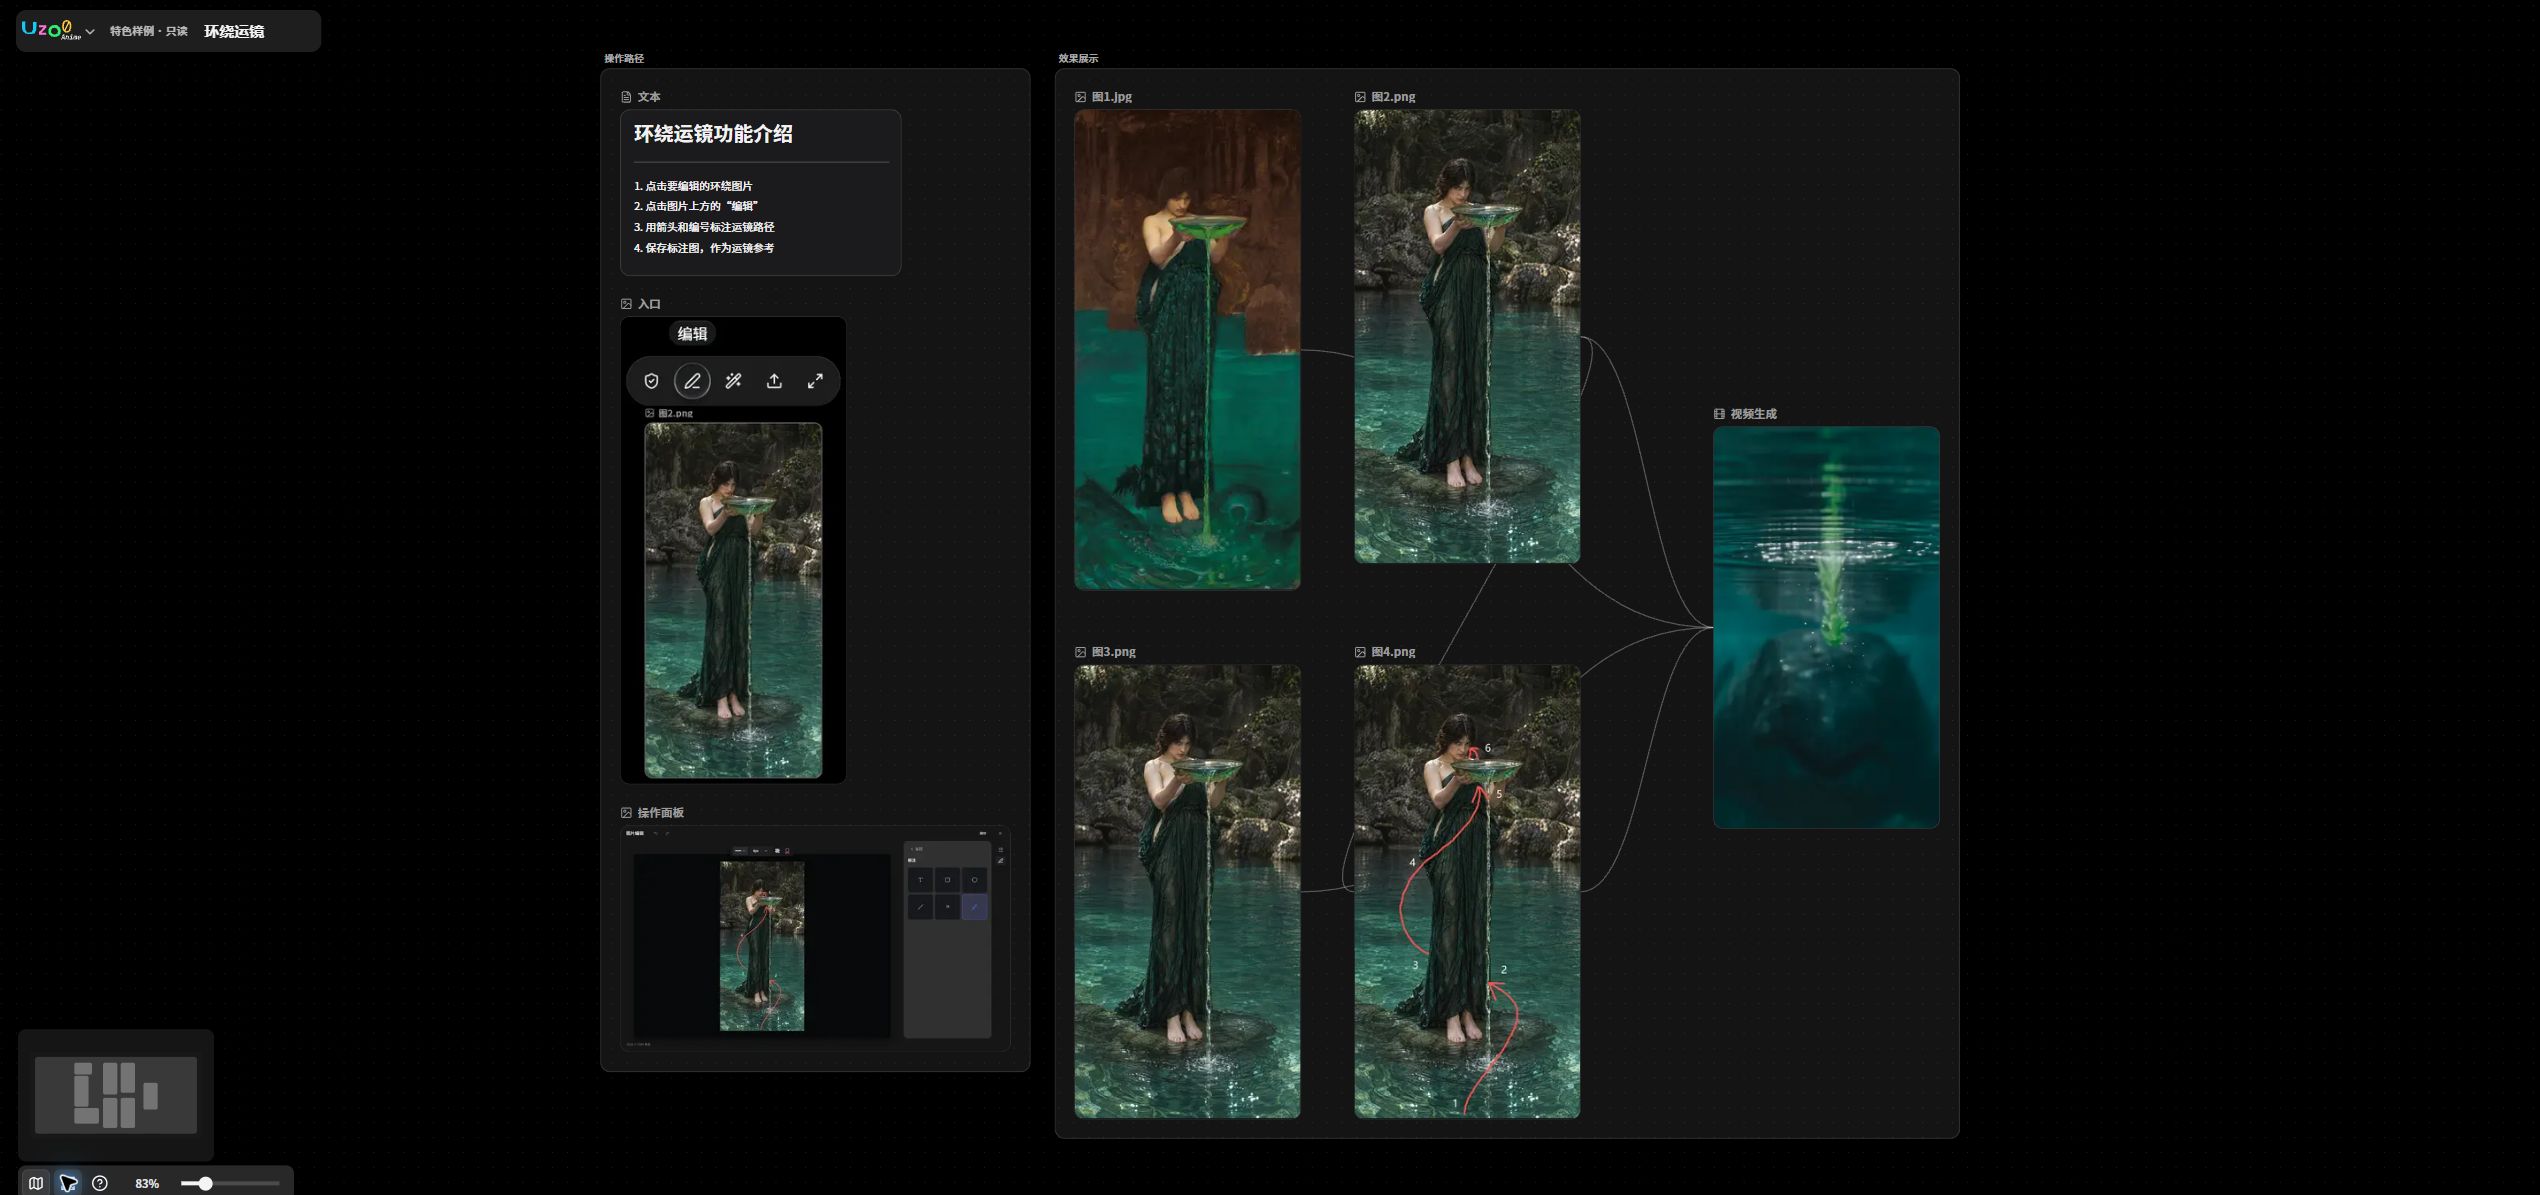
2.4.1 Text nodes
Purpose: hold and display text entered manually by the user or generated by a model.
Input methods:
- Manual input: select “Write your own content”, then type or paste text into the node box.
- Large language model generation:
- The text generator integrates large language models. Enter a natural-language request or structured prompt for the corresponding text generation task.
- Results are displayed in the “Text node box”.
- Upload images/videos to reverse-engineer prompts.
Integrated language models:
- DeepSeek V4 Flash Official: image/video understanding
- DeepSeek V4 Pro Official: image/video understanding
- Doubao Seed Evolving: image/video understanding
- Doubao Seed 2.1 Pro: image/video understanding
- GLM-5.2: image understanding
| Model | Description |
|---|---|
| DeepSeek V4 Flash Official | Fast and cost-effective, suitable for everyday text generation and script analysis |
| DeepSeek V4 Pro Official | Flagship performance for deep reasoning and complex professional tasks |
| Doubao Seed Evolving | Evolving Doubao model with strong long-horizon Agent capabilities and continuous automatic iteration |
| Doubao Seed 2.1 Pro | Standard Doubao model with multimodal coding and image-to-code support |
| GLM-5.2 | Zhipu's open-source flagship with strong long-horizon coding and Agent capabilities |
Basic editing:
- T: font color
- Fill: node theme
- Copy: copy selected elements
- Undo: go back one step
- Redo: restore an undone step
- Zoom: enlarge the input area
- Down arrow: switch to rich-text editing
Rich-text editing:
- T: font color
- H1/H2/H3: heading levels
- ¶: paragraph settings
- B: bold
- I: italic
- Unordered list: bulleted list
- Ordered list: numbered list
- Divider: insert a horizontal rule
- Fill: node theme
- Copy: copy content
- Undo: go back
- Redo: restore
- Zoom: enlarge the input area
- Up arrow: return to basic editing
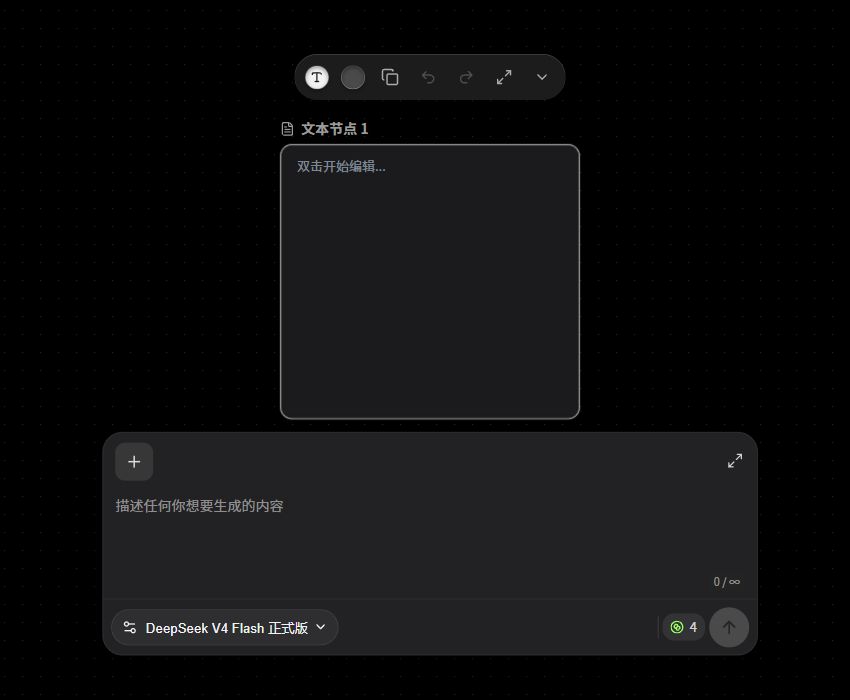
2.4.2 Image nodes
Purpose: hold and display a single image uploaded by the user or generated by an image model.
Input methods:
- Direct upload: drag an image onto the canvas from outside, or right-click a blank area and select “Upload”.
- Image model generation:
- The image generator integrates official image generation models.
- Supports text-to-image, image-to-image, multiple-reference fusion, and image editing tasks.
- Results are displayed in the “Image node box”.
Integrated image models:
- Uzoo image 2
- Uzoo image 2 Official
- Uzoo Image 2.5 Flare
- Uzoo Image 2.5 Sunburst
- Uzoo Banana 2
- Uzoo Banana Pro
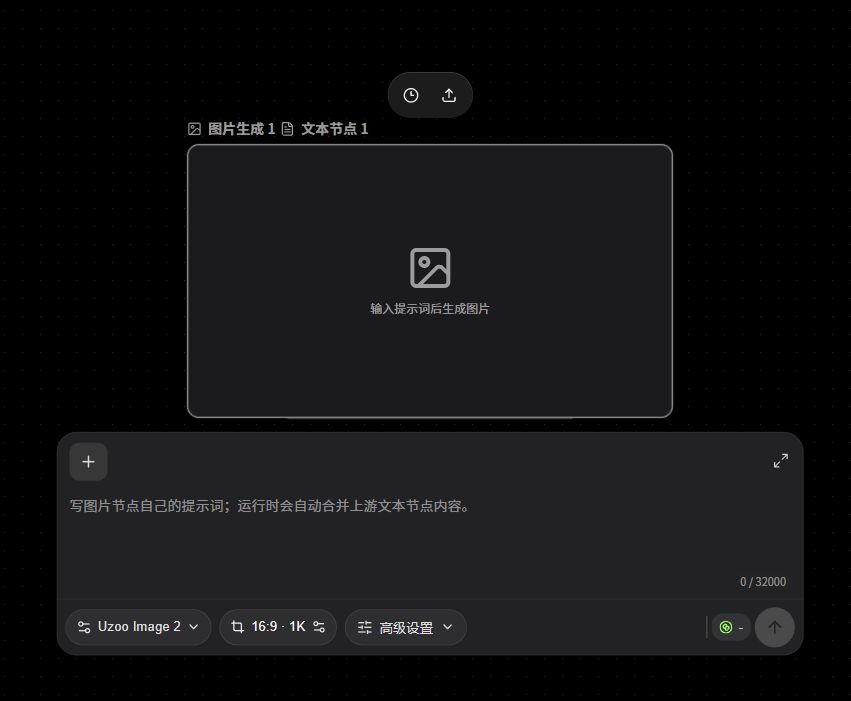
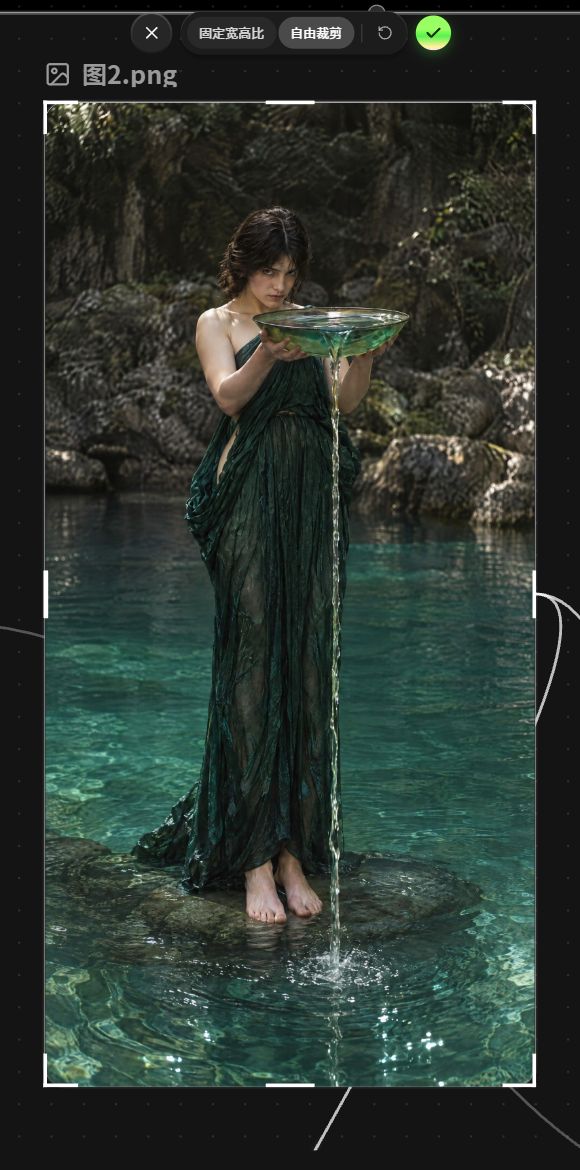
2.4.2.1 Image editing and annotation
- Compliance check: real-person images used with Seedance must pass the check.
- Edit image: make basic asset adjustments, including cropping, flipping, and annotations.
- Background removal: automatically separate the subject from the background, remove/replace the background, and extract the subject.
- History: save editing steps, with undo and the ability to return to any previous editing state.
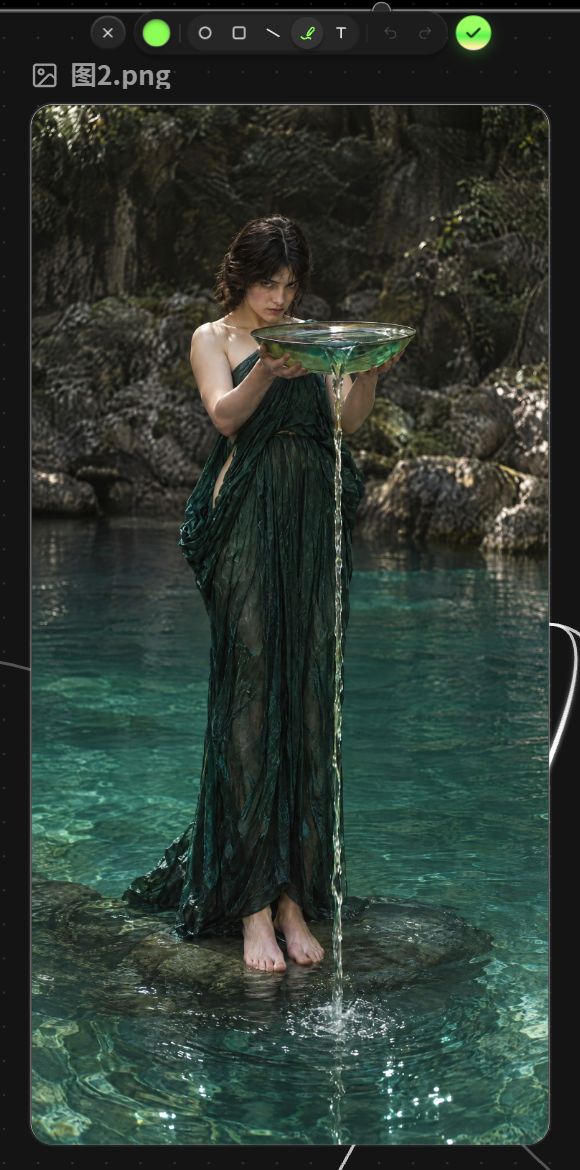
2.4.3 Video nodes
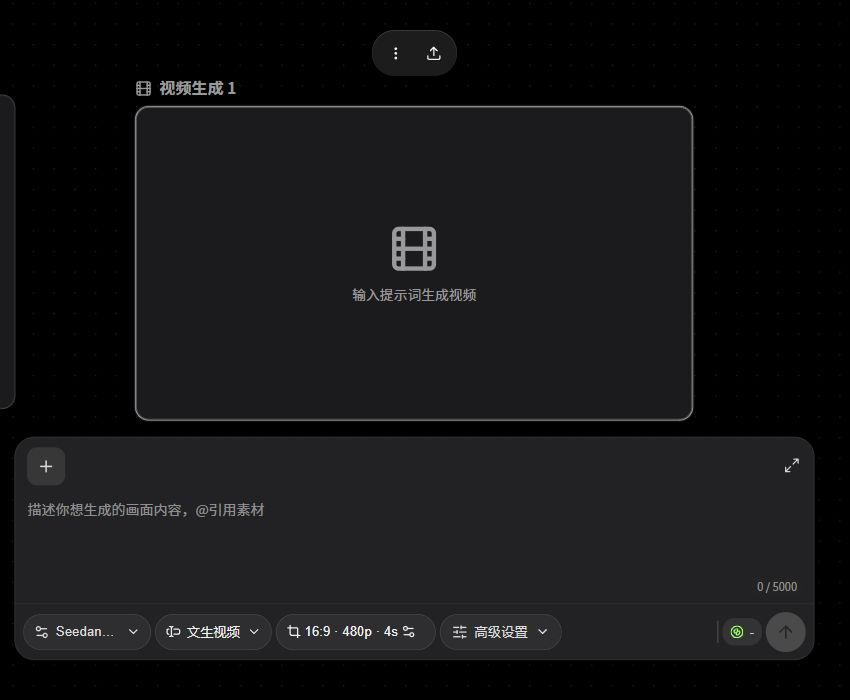
Purpose: hold and display a single video uploaded by the user or generated by a video model.
Input methods:
- Direct upload: drag a video onto the canvas from outside, or right-click a blank area and select “Upload”.
- Video model generation:
- Supports text-to-video, combined references, and video editing.
- Results are displayed in the “Video node box”.
Integrated video models:
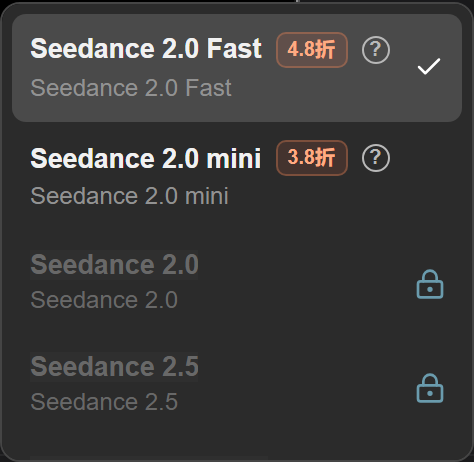
- Seedance2.0 mini
- Seedance2.0 fast
- Seedance2.0
- Seedance2.5
2.4.3.1 Video editing options
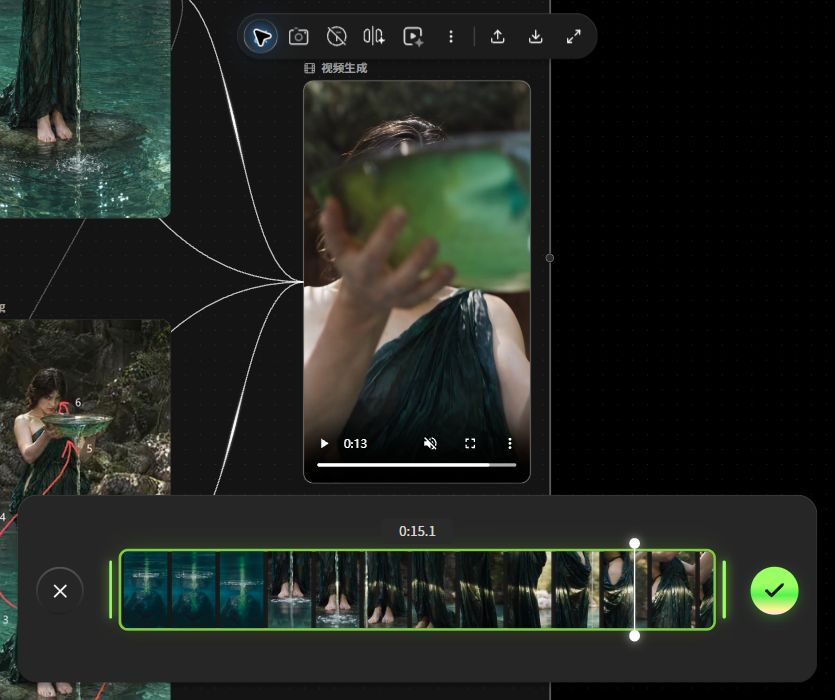
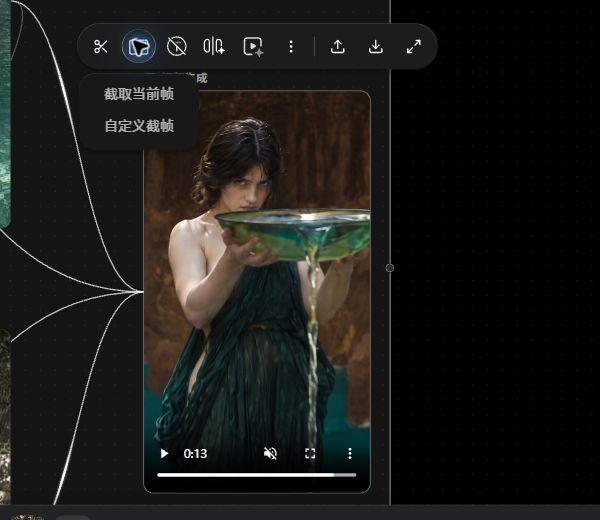
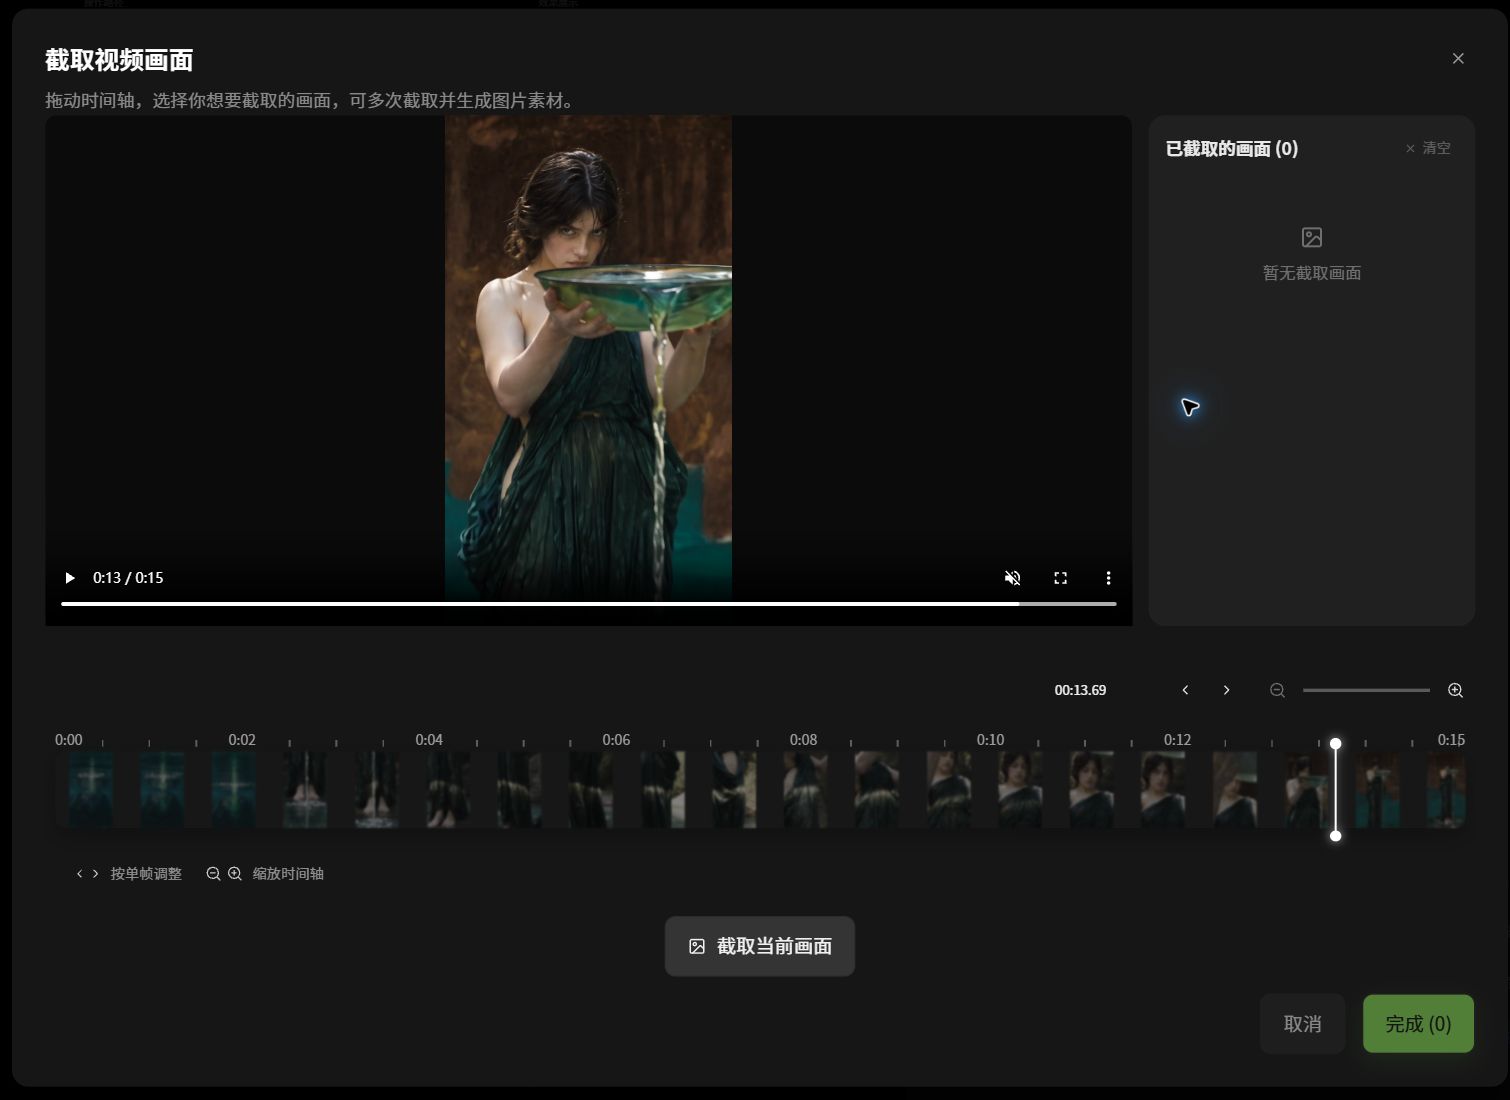
- Video editing: split, delete, and trim unwanted footage.
- Frame capture: capture a frame at any time and export it as an image.
- Subtitle removal: automatically erase existing subtitles and subtitle watermarks while preserving the underlying footage.
- Segment reshoot: select a specific segment and regenerate it with AI to replace that segment without changing the rest of the video.
- Video restyling: redraw the overall visual style while preserving motion and composition.
- View node generation history and run the Seedance eligibility check.
Download video
2.4.3.2 Seedance2.0 model guide
Note: before generating real-person videos with Seedance, uploaded character assets must pass portrait authorization checks.
Seedance2.0 model usage commitments
To ensure lawful and compliant use of the services provided by the Seedance2.0 model, please carefully read, fully understand, and make the following commitments before use:
- You hold sufficient lawful rights to the assets you are about to upload or use.
- This includes, but is not limited to, images, videos, audio, text, character appearances, virtual portraits, voices, and brand elements.
- If uploaded assets may involve another person's likeness, voice, biometric features, trademarks, copyrighted content, or other intellectual property, ensure that you have obtained sufficient authorization and do not infringe any third party's lawful rights.
- You are responsible for the generated content and the consequences of its use.
You understand that AI-generated results are uncertain. You are responsible for deciding whether to publish, distribute, or commercially use generated content, and for the associated legal consequences.
- The platform may impose restrictions if you misuse the service.
Any misuse of assets involving third-party lawful rights will be treated as a violation. The platform may block generation, delete content, restrict downloads, suspend services, or terminate services, among other measures. You are responsible for compensation for any resulting losses to the platform or third parties.
2.5 Lower-left toolbar
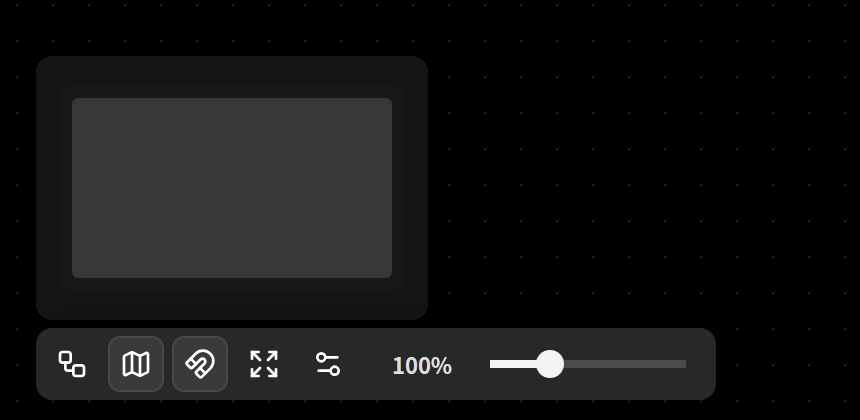
- Minimap navigation: drag the minimap to quickly move around the canvas view.
- Canvas zoom: adjust the view from 10% to 300%.
- Auto-arrange canvas: automatically organize the layout of canvas assets.
- Hide minimap: toggle the canvas minimap.
- Auto-snap: align dragged elements with asset edges automatically.
- Fit to screen: automatically scale the canvas to fit the window.
- Shortcuts and feedback: view keyboard shortcuts and submit feature feedback.
Known bug: auto-arranging the canvas cannot be undone. You may want to avoid this feature for now.
3. Basic canvas operations
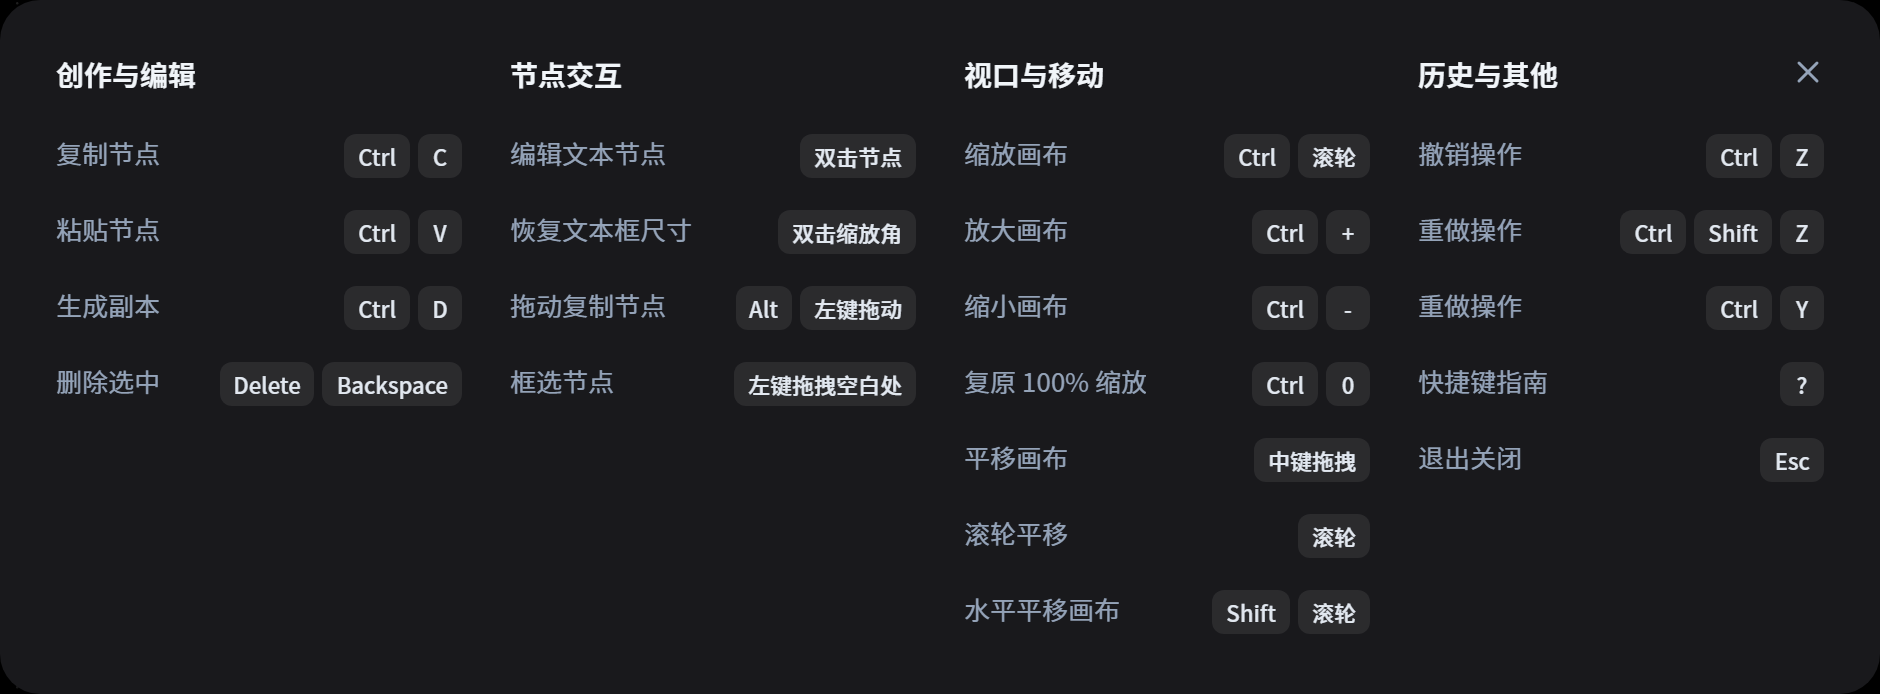
3.1 Keyboard shortcuts
Canvas viewport (browse large workflows without editing node contents)
Use when there are many nodes, when zooming in for detail or out for the overall workflow, or when moving around the canvas.
- Ctrl + mouse wheel: zoom in or out to view node details or the overall workflow.
- Ctrl + / Ctrl -: quickly zoom in or out.
- Ctrl + 0: restore the canvas to its original 100% zoom.
- Middle-button drag: pan the canvas view.
- Mouse wheel: pan vertically.
- Shift + mouse wheel: pan horizontally.
Node editing (build, modify, copy, and arrange workflows; most commonly used)
Use when adding nodes, reusing copies, adjusting multiple nodes, or editing text node contents.
- Ctrl + C / Ctrl + V: copy and paste nodes to another area of the canvas.
- Ctrl + D: create a duplicate of the selected node in place (a frequent shortcut for quick local reuse).
- Alt + left-button drag: duplicate a node while dragging and position the new copy.
- Double-click a node: edit the text inside a text node.
- Double-click the resize corner: reset a text box to its original size if it has been stretched.
- Left-button drag on a blank area: box-select multiple nodes.
- Delete / Backspace: delete selected nodes to remove unwanted nodes.
History and assistance (undo operations, close dialogs, and view shortcuts)
Use to undo mistakes, try alternatives, open the shortcut help panel, or close dialogs.
- Ctrl + Z: undo the previous operation.
- Ctrl + Shift + Z / Ctrl + Y: redo an undone operation.
- ? key: open the complete keyboard shortcut guide.
- Esc: close dialogs or exit the current editing mode.
3.2 Add nodes
Right-click and select the type of node to add.
3.3 Grouping
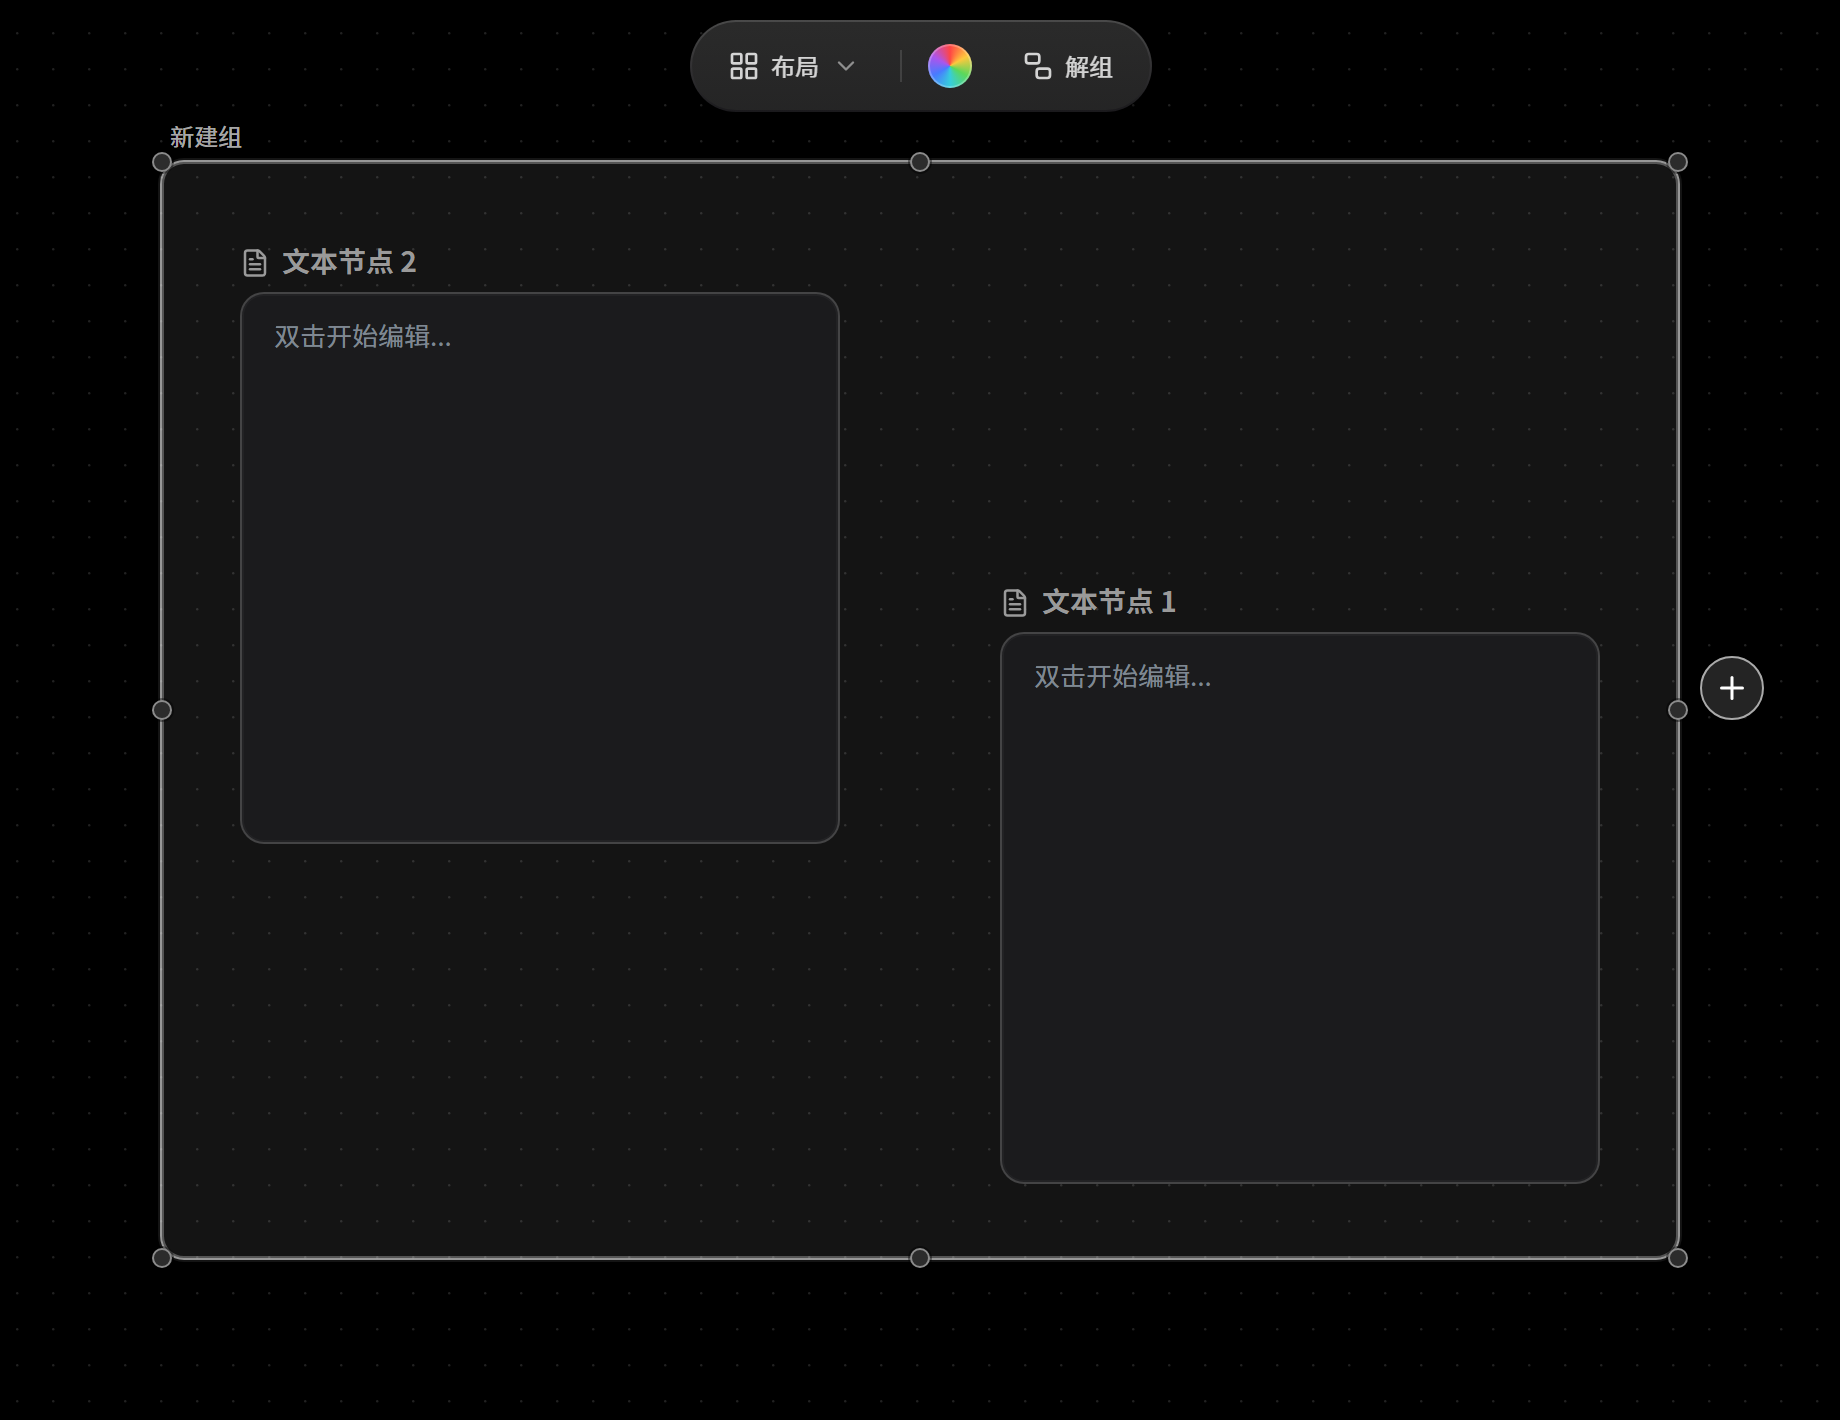
Select an entire workflow and right-click to group it. Once grouped, the workflow can be moved and arranged as a whole.
- Select multiple image generation nodes on the canvas and choose Group from the right-click menu to place them in one group box.
- Create an image/video generation node outside the group.
- Drag a connection from the output port of the group box to the input port of the new node on the right.
- Once connected, the nodes inside the group can pass data to the new node for subsequent generation.
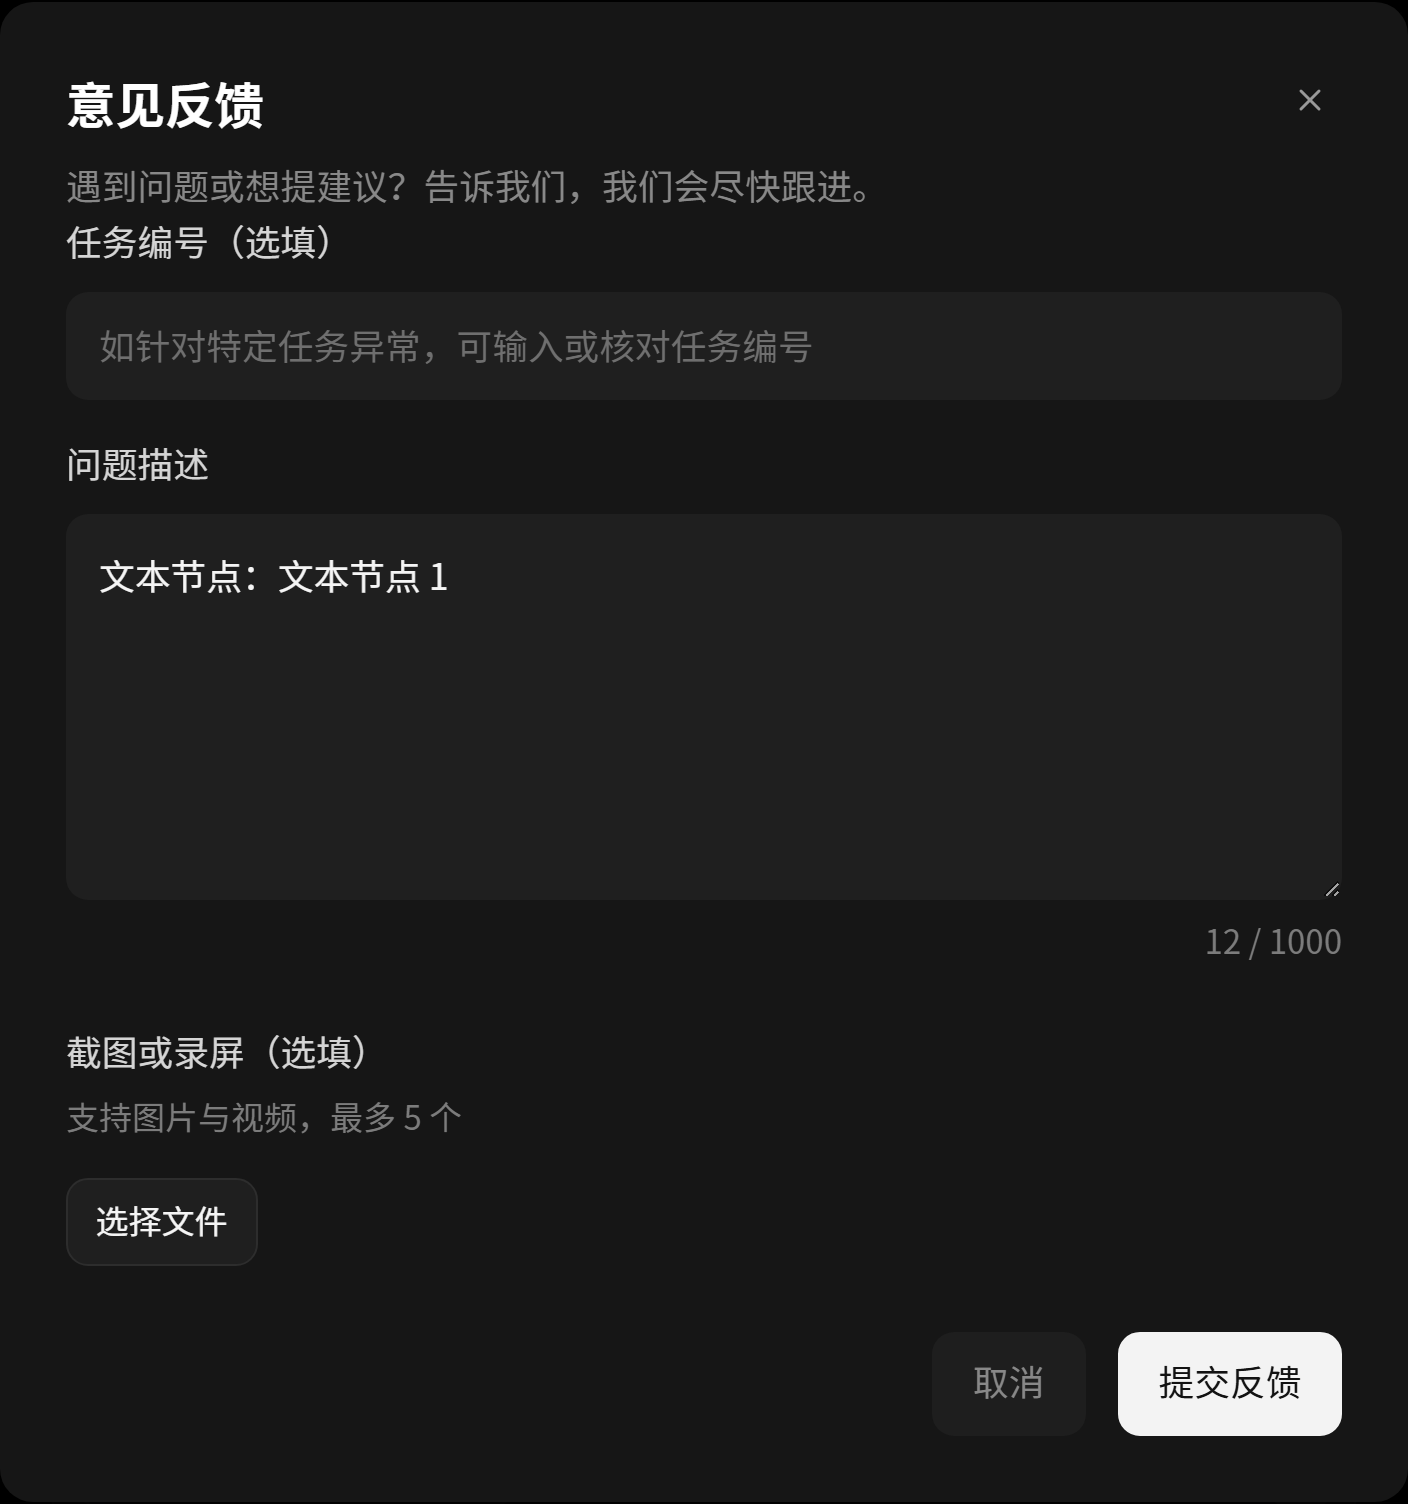
3.4 Report an issue
- Right-click a node on the canvas to open the node actions menu.
- Find and click [Report an issue].
- In the feedback dialog, describe the problem with the current text node and submit it.
- The platform collects information related to that node to investigate and fix the issue.
Additional note: this feature reports node-related bugs and functional issues to the product team. Submitting a report does not affect the current canvas or node contents.