Team collaboration
Create a team, invite members, organize projects and tasks, and manage collaboration through roles, allowances and usage records.
1. Create a team
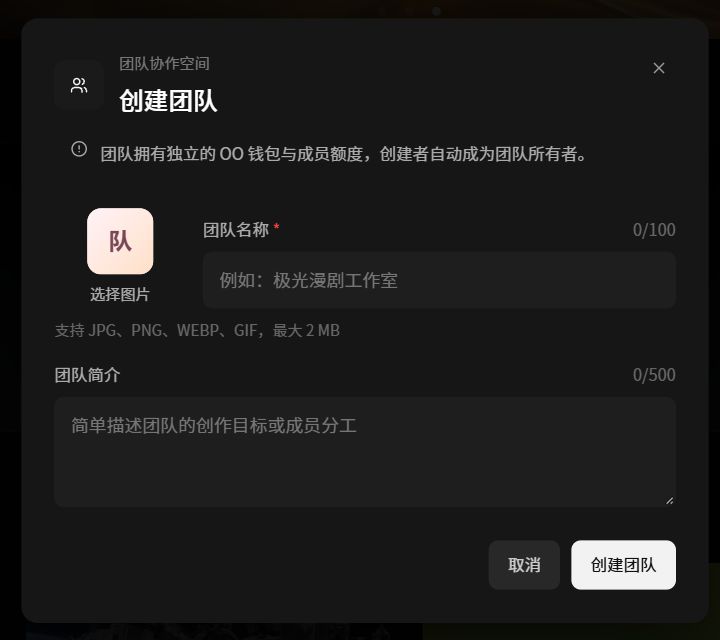
- Click your avatar in the upper-right corner, open the dropdown menu, and select [Create new team] to open the team creation dialog.
- Enter the team name in the team name field.
- Optionally, add a team description, creation goals, or member responsibilities in the team introduction field.
- Confirm the information and click [Create team]. To cancel, click [Cancel] or the close button in the upper-right corner of the dialog.
Additional note: after creating a team, you automatically become its owner. The team has an independent OO wallet and member allowances, and you can invite others to collaborate.
2. Open the team collaboration workspace
- Click your avatar in the upper-right corner, select the target team in the dropdown menu, and switch to it.
- Click the team space icon in the left navigation bar to open that team's collaboration workspace.
Additional note: the team owner has full management permissions, including creating projects, inviting members, and viewing overall usage. Team benefits are independent of personal benefits and use the team plan's allowances.
3. Invite members
3.1 Instructions for the inviter
Inviter steps:
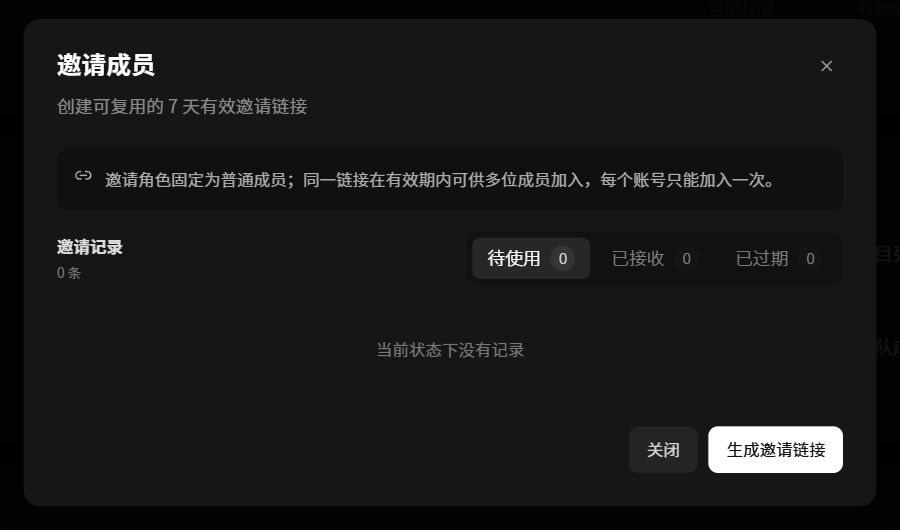
- Click [Invite members] in the upper-right corner of the team workspace to open the invitation dialog.
- Review the invitation rules and past invitations, then click [Generate invitation link].
- Once generated, click [Copy invitation link]. A success message appears at the top. Share the link with others; they can open it to apply to join the team.
- In the invitation history, you can copy or revoke a link at any time. Revoked links stop working immediately.
- Click [Close] when finished.
Additional notes:
- Members joining through the link receive the ordinary member role by default.
- Invitation links are valid for seven days and can be used by multiple people, but each account can join the team only once.
- Links can be revoked manually and cannot be used after revocation.
3.2 Instructions for the invitee
Invitee steps:
- Open the invitation link sent by the team owner. The [Team invitation] dialog shows the team name, member role, and invitation validity period.
- Click [Handle later] to close the dialog and postpone the decision, or [Confirm join] to join the team.
- After joining, click your avatar in the upper-right corner and select the team name in the dropdown menu to switch to it.
- Click the team space icon in the left navigation to open the collaboration workspace and view projects and assigned tasks.
Additional notes:
- The joining role is fixed as an ordinary team member.
- Invitation links have an expiry date and cannot be used after they expire.
4. Assign tasks
4.1 Assigning tasks as a project lead
- Open the project details page and the task management panel.
- Create a task, enter its name, requirements, and deadline, and link assets and a canvas.
- Select a team member as the assignee, verify the information, and complete the assignment.
- Monitor member progress in the task list, receive submitted work, and review it.
Additional note: the task activity log records assignments, cancellations, and other changes throughout the process so the team can trace task history.
4.2 Working on an assigned task
- Open the platform's assignment notification and task details to review the requirements, deadline, and your permissions.
- Return to the team project and open the corresponding task to view its linked assets, canvas, and other information.
- Open the canvas with your assigned permissions and carry out the production work. You can check project updates at any time.
- Submit the results when finished. The system automatically notifies the project lead.
5. Member roles
| Role | Permissions |
|---|---|
| Administrator | Invite/remove members, set roles, top up the team wallet, allocate allowances, and view every member's spending |
| Project owner/lead | Create projects, assign tasks, view project work and parameters, and review tasks |
| Ordinary member | Take tasks, upload work, and view their own spending records |
6. Team collaboration workspace guide
6.1 Team workspace homepage
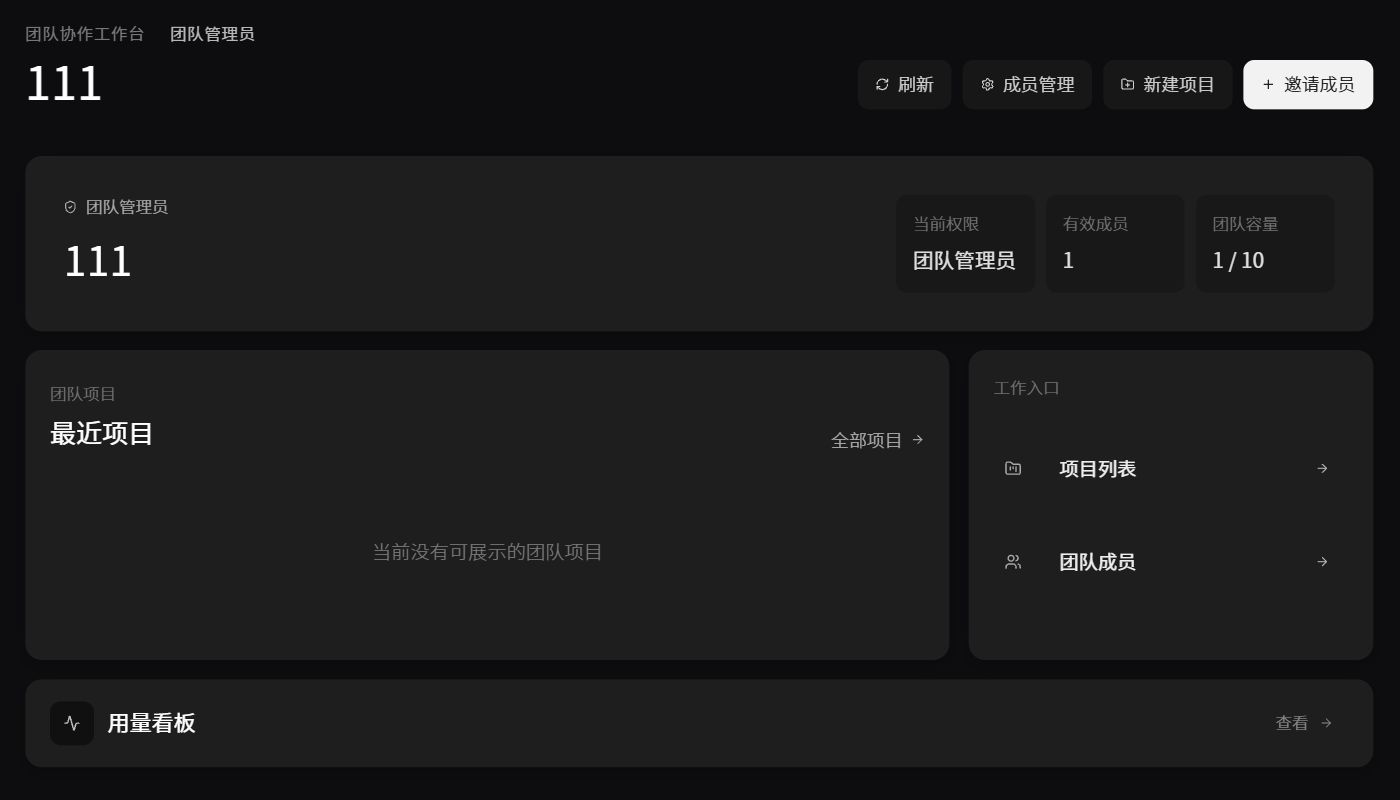
6.1.1 Top action bar
- Refresh: synchronize all data on the current page.
- Member management: open the team member and permission management page.
- New project: quickly create an animated-drama project.
- Invite members: generate an invitation link to add team members.
6.1.2 Team information card
Displays core team information:
- Team name and your current role (team owner / member / project lead).
- Active members: the number of team members in normal status.
- Team capacity: current members / maximum members (for example, 2/50).
6.1.3 Team projects | Recent projects
- Shows recently accessed team projects, including name, type, episode count, creator, and creation time.
- Click “All projects” to open the complete team project list.
- Click a project entry to open its details.
6.1.4 Work shortcuts
Quick navigation:
- Project list: view all team projects.
- Team members: view the member list and permissions.
6.1.5 Usage dashboard
Click “View” to open team resource statistics, including overall OO Coin consumption, generated task counts, and other usage data for cost management.
6.2 Team project list
- Projects have three statuses:
- In progress: projects currently being produced.
- Completed: all tasks have been finished.
- Archived: projects stored as archives.
Deleted projects do not appear in the list.
- Available actions:
- Search: search by project name, type, or project lead keywords.
- New project: create a team project.
- Refresh: refresh the list data.
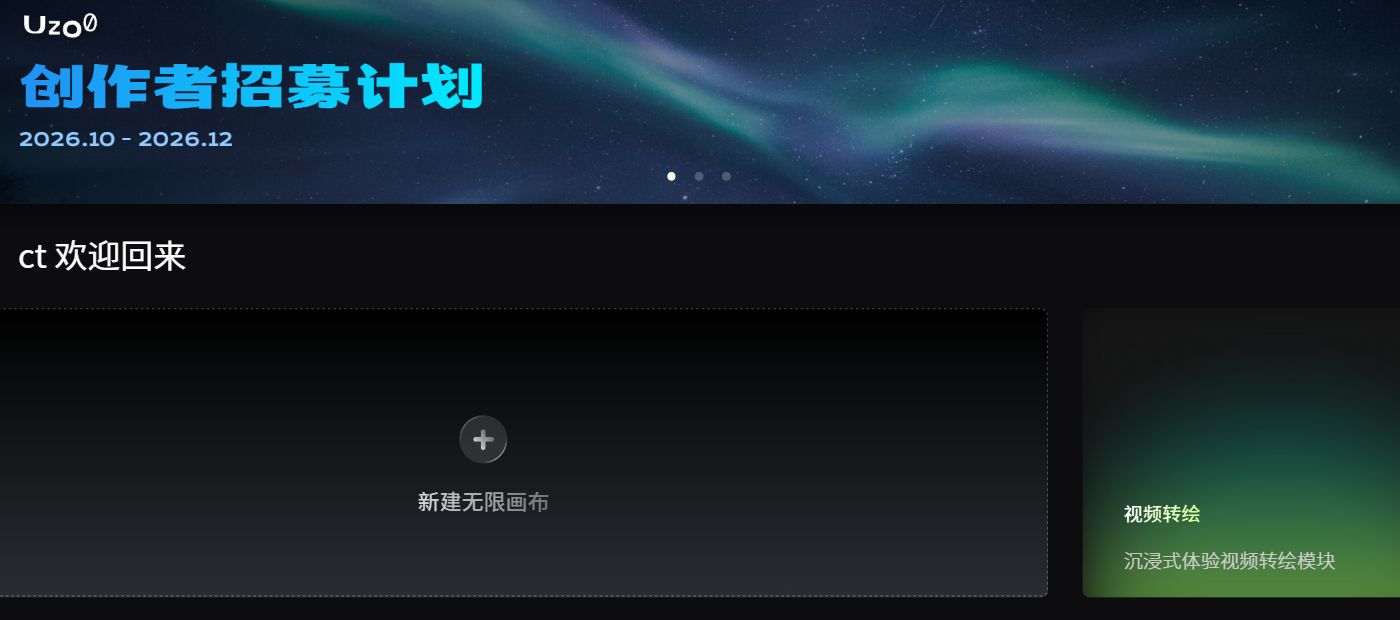
6.2.1 Create a team project
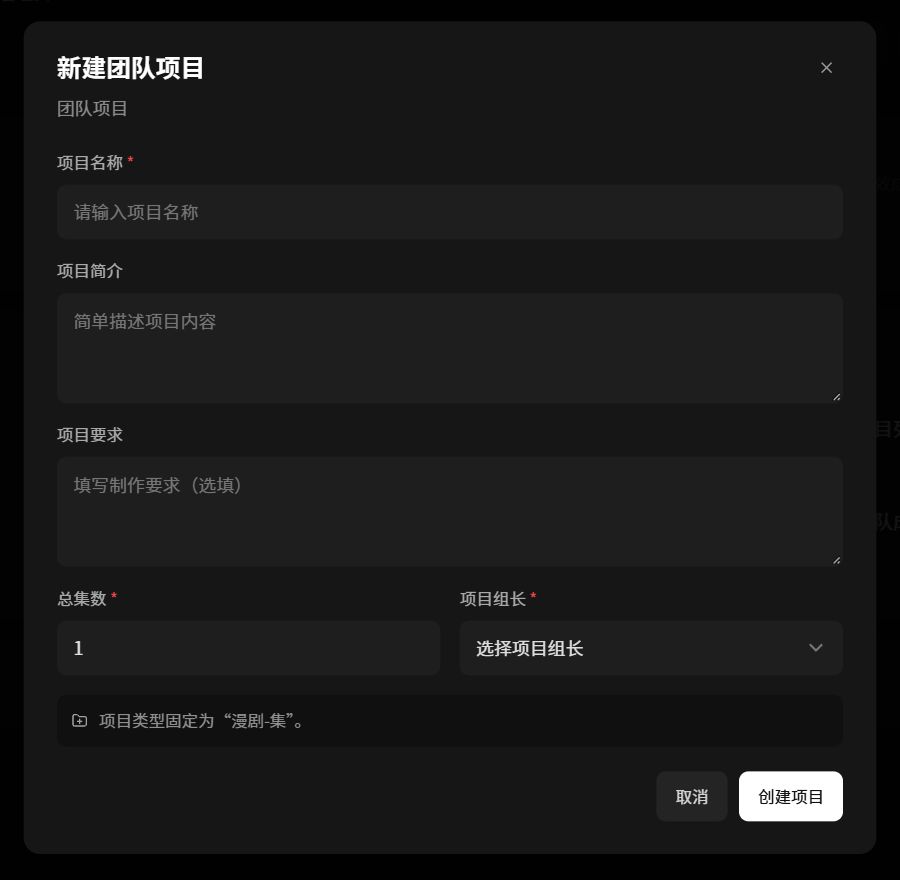
Click “New project” on the team project list page to create an animated-drama project and configure its basic settings in one step.
- Project name: enter a clear name that distinguishes series or seasons.
- Project introduction: briefly describe the content, genre, style, or goal.
- Project requirements: optionally enter production standards, visual requirements, character consistency requirements, and delivery criteria.
- Total episodes: required. Tasks are generated for each episode after creation.
- Project lead: required. Choose a team member to manage subsequent task assignments and progress.
6.3 Project details and task management
[Team projects]
- The page lists all projects, showing name, type, project lead, task scope, status, and update time.
- Click the arrow on the right of a project to open its details.
[Project details]
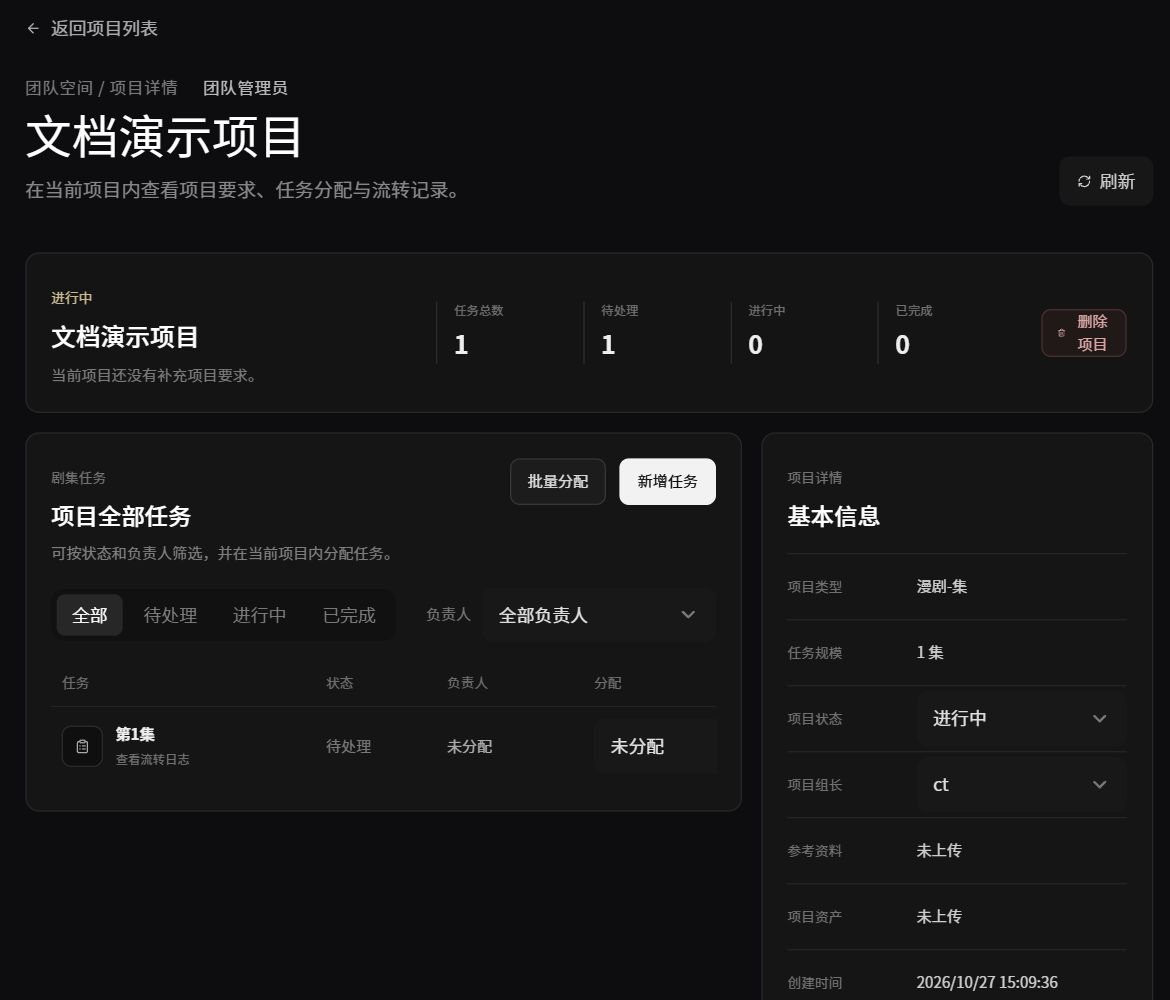
- Top: overall project statistics, including total tasks, pending tasks, in-progress tasks, and completed tasks.
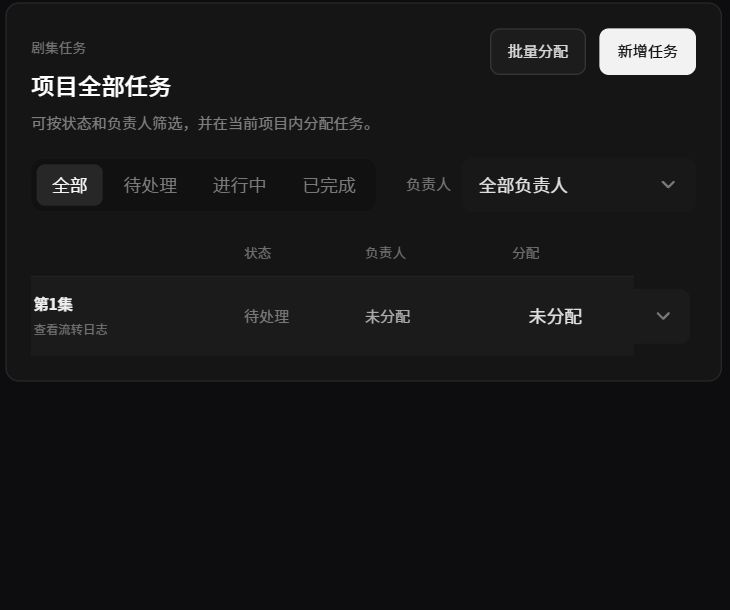
- Episode tasks: all episode tasks, filterable by status and assignee, with each episode's status, assignee, and activity log. Project leads can add tasks and assign tasks in bulk.
- Project details on the right: basic information including project type, task scope, status, project lead, reference materials, project assets, and creation time.
6.3.1 Project overview bar
- Project name and status
- Task statistics: total, pending, in progress, and completed
- Delete project: a high-risk operation that permanently deletes the current project
6.3.2 Complete project properties
- Project type and task scope
- Project status: switch between In progress / Completed / Archived
- Project lead: select a team member from the dropdown
- Reference materials and project assets: upload entry points (in development)
- Creation time and last update time
Team owner permissions: view all tasks, filter by assignee, assign work, and change statuses.
6.3.3 Bulk assignment
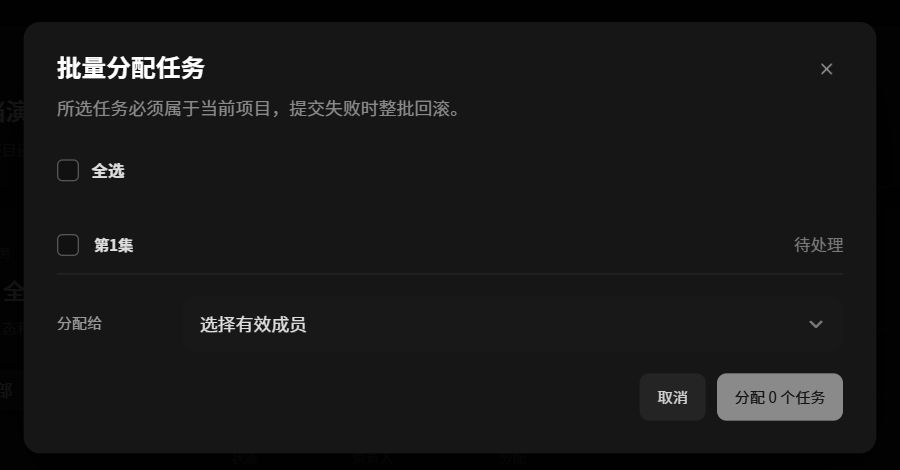
Assign multiple episode tasks to an owner at once:
- Select the tasks to assign.
- Choose a team member in the “Assign to” dropdown.
- Click “Assign tasks” to complete the bulk assignment.
Note: all selected tasks must belong to the current project. If submission fails, the entire batch is rolled back; no partial assignments take effect.
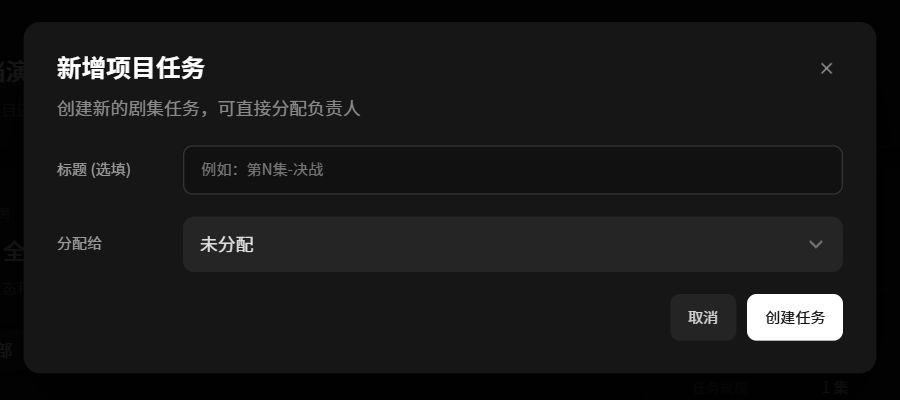
6.3.4 Add a task
- Title: optional; a name such as “Episode N - Subtitle” can be used.
- Assign to: choose an owner; the default is “Unassigned”.
- Click [Create task] to add it.
6.3.5 Task “⋮” more menu
The [⋮] menu on the right of a task:
- Completed: manually mark the task as completed.
- Canvas: open the canvas editor for that episode.
- Delete: delete this task.
6.4 Team members and permissions
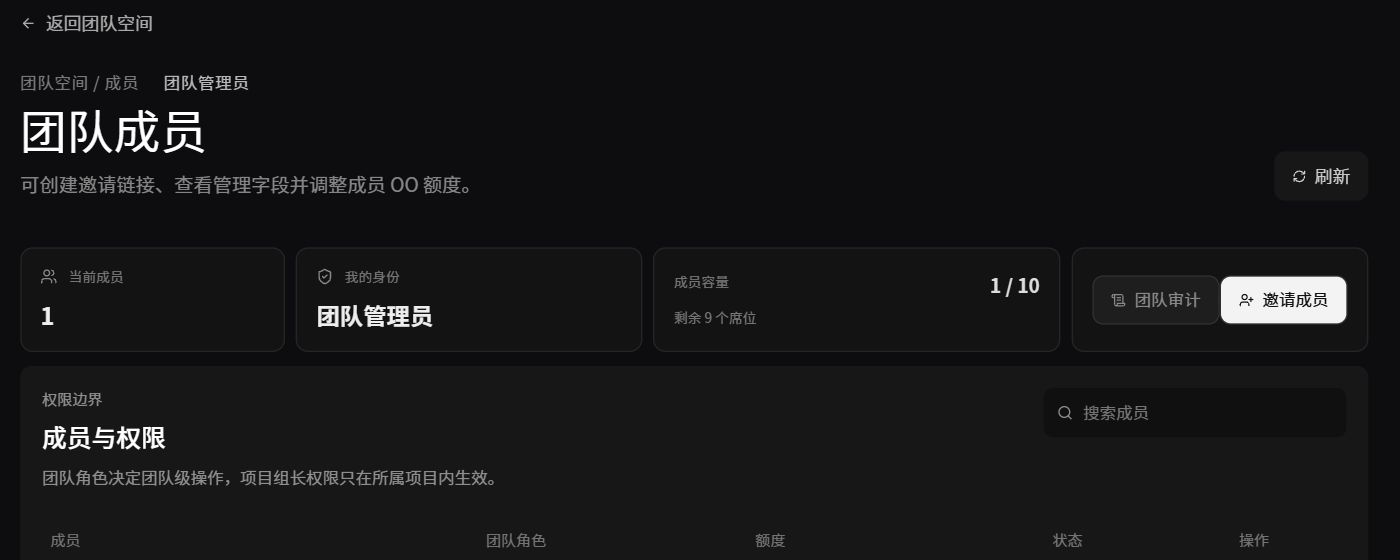
Manage team members, roles, and compute allowances.
- Current members: the number of active team members.
- My role: your account's current team role.
- Member capacity: current / total capacity and remaining seats.
- Action buttons:
- Team audit: view team operation logs.
- Invite members: generate invitation links to add members.
- Role permissions:
- Team owner: highest permissions, with full control over members, projects, allowances, and audit records.
- Project lead: permissions apply only within their projects; responsible for task assignment and progress management.
- Member: basic permissions to handle assigned tasks and use compute within their team allowance.
6.4.1 Set member allowances
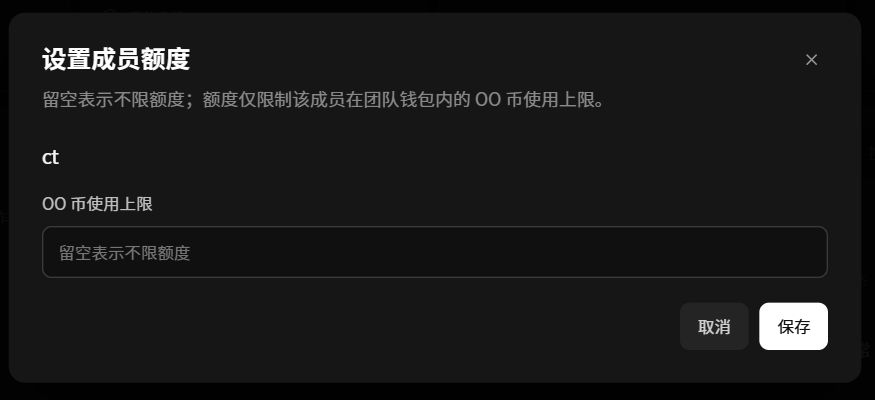
Limit an individual member's team OO Coin spending.
- Enter the OO Coin usage cap in the input field.
- Leave it blank for no limit.
- The allowance only limits this member's spending from the team wallet; it does not affect their personal account.
- Click [Save] to apply it.
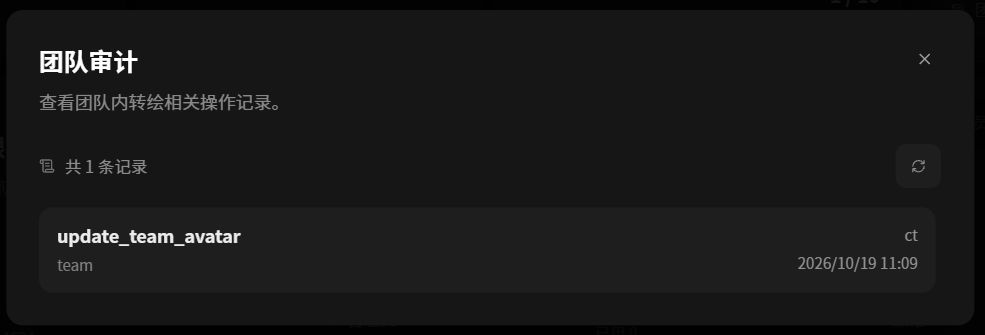
6.4.2 Team audit
Team audit
Review video-restyling-related team operations to trace activity:
- Records the operation type, target, operator, and time.
6.4.3 Invite members
The invitation dialog creates reusable team invitation links that are valid for seven days.
The joining role is fixed as an ordinary member. A link can be used by multiple members during its validity period, while a single account can join the team only once through the link.
See “3.1 Instructions for the inviter” and “3.2 Instructions for the invitee” in this chapter.
6.5 Usage dashboard | Credit details
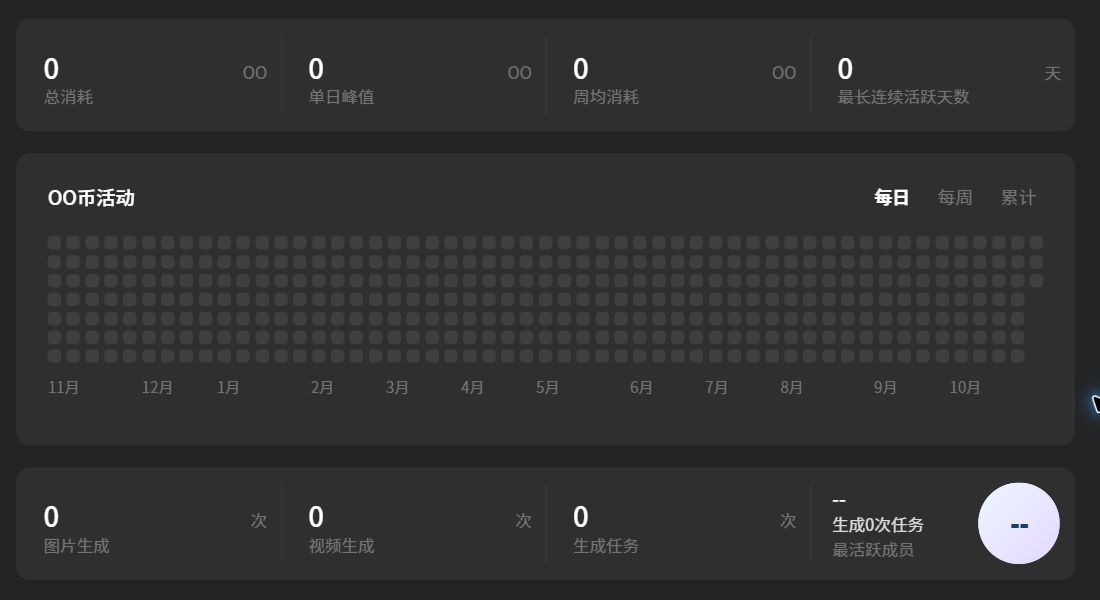
6.5.1 Usage dashboard
View overall team resource consumption, credit usage, and generation activity to manage resource costs.
- Top of page: core statistics, including total team consumption, peak daily consumption, average weekly consumption, and the team's longest consecutive active-day streak.
- Middle: an OO Coin activity heatmap calendar with Daily, Weekly, and Cumulative views. Color intensity shows resource usage across different periods.
- Bottom: counts for image generation, video generation, and all generation tasks, plus the most active members, helping managers understand member output.
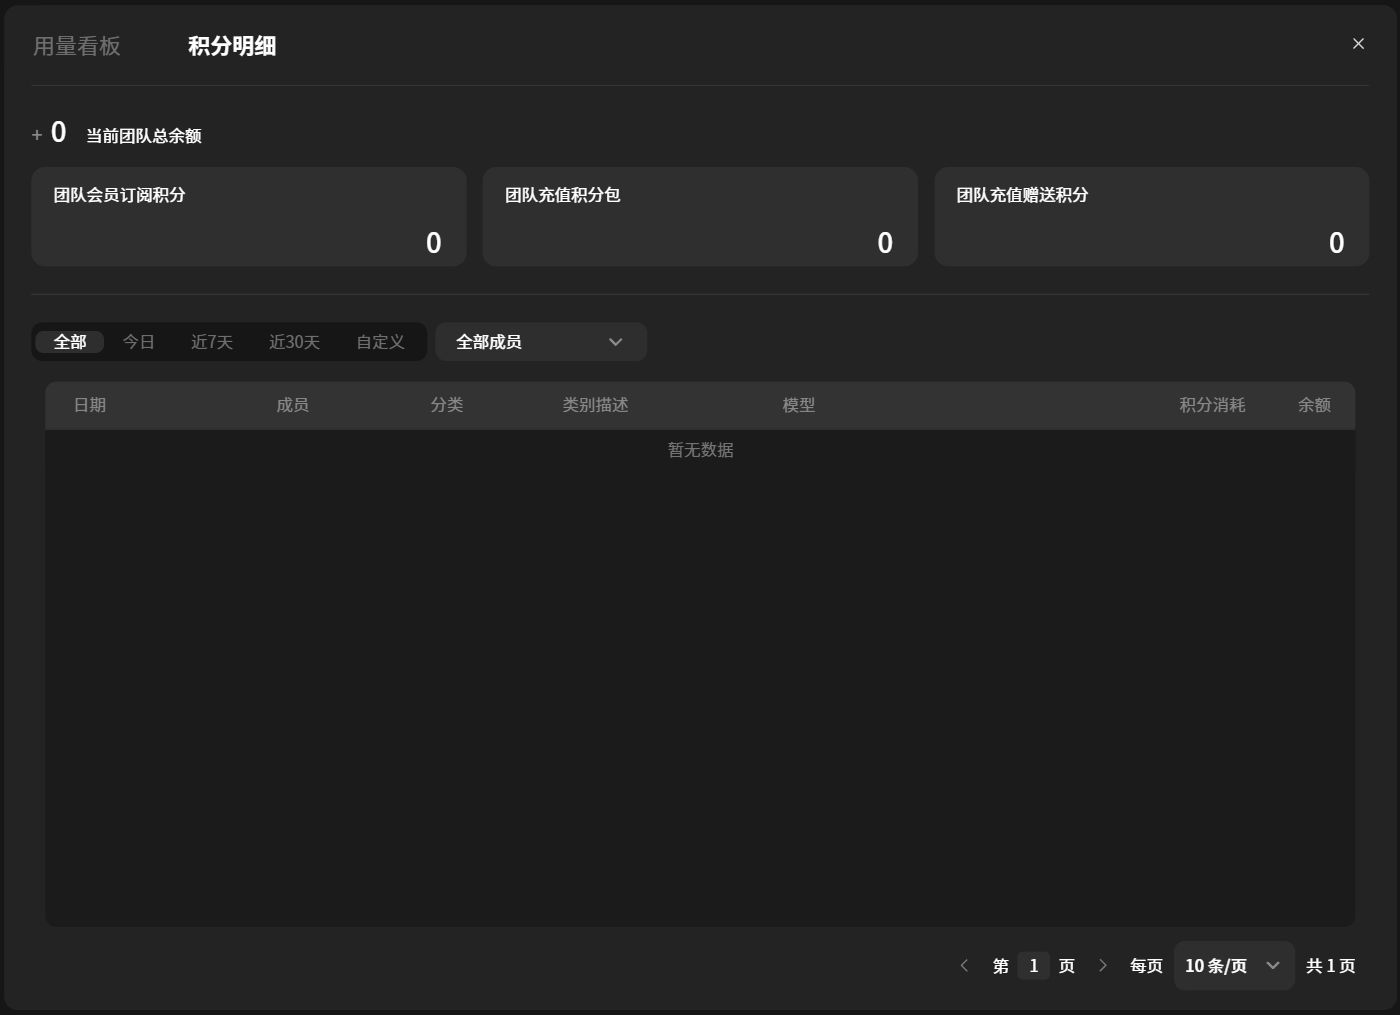
6.5.2 Credit details
Trace every team credit change for reconciliation and cost checks.
- Top of page: team balance information, including total balance, team subscription credits, purchased credit packages, and bonus top-up credits.
- Details list: each credit change, recording the date, member, change category, description, model used, credits consumed, and balance after the change.